Saturday, 11 May 2013

Nelligen Hemp Studio

The ANZAC day public holiday meant there was an extra day to build, so what else do you do when you are half way through building a house, we went and helped a friend build her studio. Nicole is building a hemp walled studio at Nelligen on the NSW South Coast. Approved by Council it is the first hemp build in the Eurobodalla Council area.

Nicole helped us out with building our hemp walls, so we wanted to repay the favour and I was keen to see how the studio was going. Her studio is being built in a beautiful location in a hill in Nelligen, with swamp and river views to the east and mountain views to the west.

View of the swamp
View out western window to the mountains
Nicole's build is different to ours in many ways and it shows that hemp walls can adapt to different styles. Nicole is building on a half suspended concrete slab, with a beautiful stone wall on the lower side. Her hemp walls are 300mm thick, to provide extra insulation in the cooler climate. To achieve deep window reveals on the inside she offset her frame toward the outside. The frame uses 90 x 35mm studs set at 450mm centres combined with large section recycled wharf timbers around the glass on the north side and as exposed beams supporting the first floor.

North and East side of the studio
Recycled wharf timbers
Nicole put up large sections of form work on the outside, avoiding the need to regularly move the form work up in the steeper sides of the studio. 600mm sections of form work were put up on the inside.

Form work on the steeper Western side
The use of 300mm thick walls was both easier and more difficult. It was definitely easier to place and tamp the hemp as there was no difficulty getting your arms and tampers around noggins and window sills. Nicole requested that her framing company put the noggins all in the same line, unlike my offset noggins. Noggins all in one row was definitely easier so that rises of hemp could be finished at the same point.

The smaller 45mm gap between the form work and studs was not a problem and plastic pipe spacers were cut to fit and she attached the form work with bugle-head batten screws. On the inside however, the larger gap between the studs and the form work meant that Nicole could not get bugle batten screws long enough to cover this distance and had to attach blocks of wood to her studs to be able to use the bugle batten screws to attach the form work. To complicate matters further the frame for her window openings were not the same distance from the form work as the frame and required different spacers.

Spacers with extra blocks of wood
Different sized spacers with window frame in background
Nicole used fibro as permanent shuttering around her window openings. If I build again I would do this, but would use something breathable like magnesium oxide board. I chose not to use this method, although it was recommended, as I wanted to curve the edge of my window openings. Nicole found a better way to do this by stopping the permanent shuttering a little bit short  of the edge, still allowing the edge of the window openings to be curved.

Permanent shuttering around window
Unfortunately Nicole has had to use sheet bracing, due to the high wind rating of the site and the second storey. Concerned about how the hemp will key into this she has attached some axe shaped blocks of wood to the sheets to give the hemp something to key into.

Sheet bracing
Nicole used Alcor as her damp proof course and I think this was a better choice than the embossed polyethylene I used. The Alcor keeps its shape when bent and was easier to turn down and hold in place.
Alcor flashing neatly turned down
Nicole is mostly using hemp that has come from the Ashford and and is a finer chop than the hemp sourced from Ecofibre in the Hunter Valley. The more finely chopped hemp seems to mix easier and tamp down more evenly. The pieces in the Ashford hemp were also more consistent in size. Given the choice I would use the more finely chopped Ashford hemp. Nicole also had her hemp in pre measured bags which made mixing much quicker. Nicole used the same Australian Hemp masonry Company binder we did. One bag of hemp was used with one bag of binder. This was a real advantage in her build since the thicker walls used up the hemp mix much quicker and the person mixing had a hard time keeping up with those filling and tamping. Nicole borrowed our pan mixer and this works well for a small crew of workers but with the thicker walls and easier placement of the hemp a large crew of workers would need a bigger mixer to work efficiently.

Finer chop of hemp
Hemp and binder mix
Pre measured bags of hemp
The sand Nicole used was a brownish yellow, rather than the grey Shoalhaven river sand we used. This meant that her walls were a warmer sandy colour when wet, but they look like they will still be a grayish white when dry, albeit with a brownish yellow tinge.

Hemp wall a few days old
Placing hemp walls
Nicole made a chook house with hemp over 12 months ago. It has been left unrendered since this time. The wall is only showing a very small amount of weathering on the bottom of the wall. This is very good as although the wall does not face the prevailing weather it only has small eaves.

Hemp walled chook house
Small amount of weathering on exposed hemp wall
I am looking forward to helping Nicole again and seeing how her studio progresses.


Western walls
Hemp walls in the afternoon sun

Thursday, 11 April 2013

Second hemp render test and Plywood Problems

Three weeks after our first render test we got to see the dry colour - grey. Not a successful test. Anticipating, from the colour when wet, that it may not be the sandstone colour we were looking for I sourced some dark yellow river sand from Thomas Landscaping at Lawson and they gave me a small plastic bag of it for free to test out if we liked it. So this became render test two.

Dry Sydney sand render test on left
Dry hemp lime render mix before sand added
 The Australian Hemp Masonry Company, who made the render mix, recommended using river sand but I first tried using Sydney sand (Beach sand) because local river sand in the Shoalhaven is a dark grey, not the colour we were after. I really liked the colour of the new dark yellow river sand, but when mixed with the render mix it got the grey/green look of the previous mix, albeit this time a bit yellower.
Yellow river sand render test showing colour of sand used

I am yet to see the second render test dried, but am ready to give up on the hope of being able to colour the render with sand alone and will now try some oxides. AHMC advise that the hemp wall need to be wetted before the application of the render, this was a bit tricky for our first render test, but for our second render test I used a garden pressure sprayer, of the type usually used for fertiliser. It worked well giving a fine spray of water that meant it was easy to control the area that got wet and how much water was applied.   

Pressure sprayer in front of render test
 Meanwhile work continued on the plywood ceiling. Despite one wall of the front bedroom not being square, we managed to do quite a good job on the ceiling.

Front bedroom ceiling finished
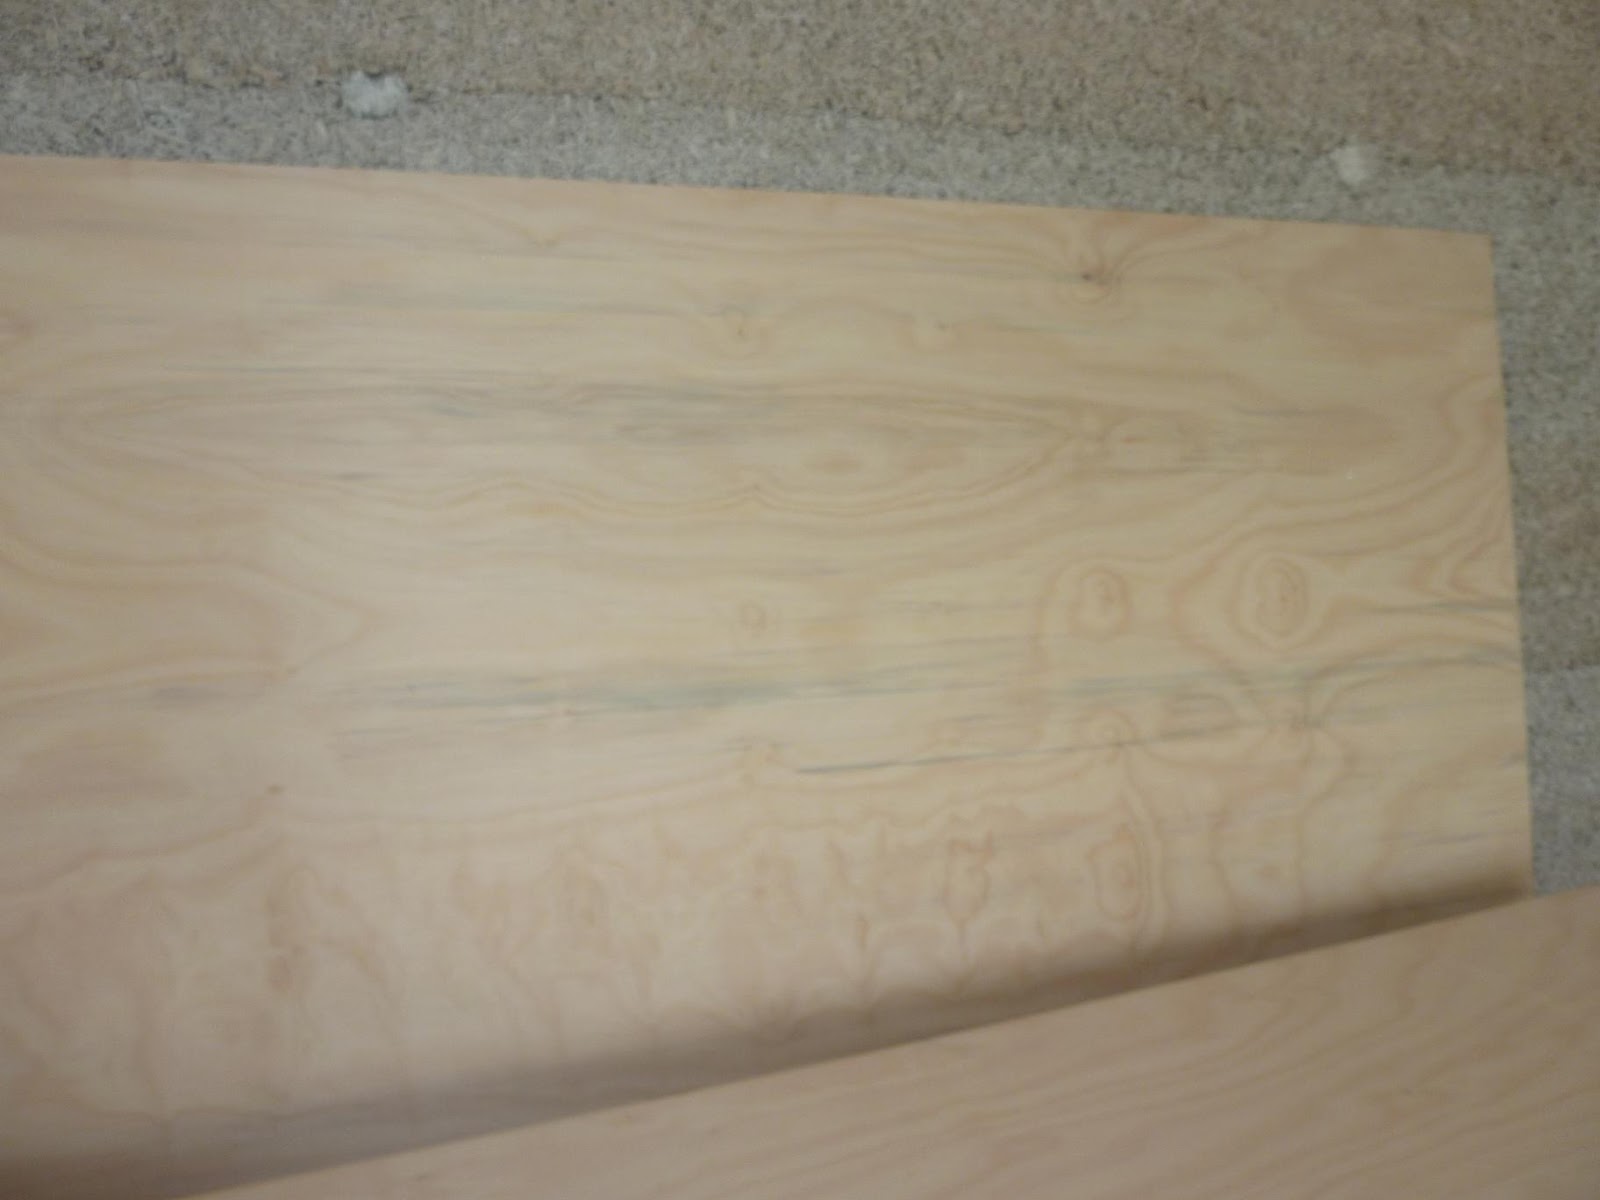
Further work was then stopped as the BB Hoop Pine ply had some horrible blue marks on it. Both on the back and face surface. We looked through the remainder of the pile and managed to find two sheets with which to finish the front bedroom. The rest of the sheets had blue marks that looked like mould, to use it on the ceiling would look like the roof had leaked and the ceiling was going mouldy, not what I paid good money for B grade ply for. 26 sheets had unacceptable blue marks on them.

Blue marks on ply
Stack of blue marked ply
A call was made to the supplier Huskisson Ply late on Friday, but the boss was not in, so no response. Several phone calls later, I finally caught the boss on the following Thursday. I e-mailed off pics of the blue stained ply and they will see what they can do. Between trying to get through to Huskisson Ply I also phoned the ply manufacturer Austral Ply to find out about the blue marks. It seems that the Australian Standard says that they are acceptable for a B grade ply - but who reads the standard! I thought by paying the extra for a B grade that the face would be good enough to use for the ceiling. None of the pics or info on the Austral Ply website mentioned blue marks. Apparently they can come about by the logs being too wet before they are made into ply and starting to go mouldy, while i was told that the ply production  process kills the mould - this does not help the fact that if used it would look like my ceiling was mouldy, not acceptable for a new house. Austral were very helpful and suggested I get the place I purchased it from to contact their supplier and see if they could exchange the problem sheets of ply.  

Meanwhile with no more usable ply sheets, we worked on the blocking that goes behind the express joints in the main room. Whether it was experience or working in a larger room but the work seemed to be getting easier. I have also accepted that nothing is ever perfectly straight in building and that you need to measure the exact location of where each piece goes and cut it accordingly. When I first started the blocking I had some problems skew nailing it with the framing nailer, particularly pushing the nailer in far enough to fire and getting the right angle. Now I can do this with ease, even using my right or left hand.

Blocking for express joints in ceiling
If necessary we can also move on to starting the internal stud walls since the Magnesium Oxide Board finally arrived. We are mostly working on site on weekends so originally booked in for the MgO board to be delivered on a weekday we would be on site. That day arrived and when it had not arrived and we had not heard about the delivery by mid afternoon I made some phone calls and found out that my instructions that the delivery had to be made on a particular date were not passed on to the transport company.

There were many subsequent phone calls as the delivery company could not deliver on weekends and could not deliver without us on sit  as we had to unload it, so because of other commitments we had that meant we could not be on site on a weekday, our delivery of MgO Boards arrived four weeks after we had originally booked for its delivery.

The MgO sheets are 8mm and did not look too heavy, but looks were deceiving, I was only able to carry one sheet at a time together with another person. Further because the truck was side loading it could not go down the driveway, otherwise there would have been nowhere for it to unload. We started carrying sheets down the driveway one by one. This would have taken a long time as we have a battle axe block. Things were sped along when the delivery boys started using a trolley loaded with four sheets at a time to wheel the sheets to the end of the driveway, from where Ben and one of the delivery boys were able to carry them two at a time into the house.

MgO Boards stacked in the house
Why did we use MgO boards - they are breathable, not damaged by water, dimensionally stable, do not harbour mould or mildew, are not eaten by termites, insects or vermin, are non toxic, and I had seen them used on Roger Bodley's hemp house in Tasmania, where they seemed to work well rendered as internal walls, which it the application I will be using them for. 

Monday, 25 March 2013

First Hemp Render Test

We did a test patch of render so that it will have plenty of time to dry, before we have to choose the sand we use for the render and whether we need to add any coloured oxide. For our first test we used the Australian Hemp Masonry Company bagged lime based render mix, we chose this for the ease of using a bagged product which would be consistent through each mix and because we like the fine hemp fibres in the render, so you can still see that it is a hemp house. To this we added  water and sand. Made up 1/20th of a 9kg bag, so ended up adding just over a kilo of sand. We used Sydney sand. AHMC recommended the use of river sand, however the locally available river sand in the Shoalhaven area is a dark grey. This was all right for the wall mix but is not what we want for the colour of our render. I was told by the landscaping and hardware store that the Sydney sand was what was used for rendering, that of course referred to cement rendering. The bulk Sydney sand I had seen was a light yellow, but when a bag of sand was purchased it was browner than expected.

Mixing the render in a bucket
Because we were mixing a small amount we just mixed it by hand in a bucket. We chose to do a test patch behind where the kitchen cupboards will go. The hemp fibre made the mix stiffer and less plastic than a cement render. Using a hawk and float it seemed to stick to the wall quite well, although pressing the render into the wall gave that arm muscles a good work out. The wall had to be damped down before the render went on. This was a bit tricky without a sprayer and we have subsequently bought form Aldi an 8L pressure sprayer, hopefully we can damp down the internal walls with this, so we do not have to use a hose inside the house.

I have read elsewhere hemp lime render being described as like "tuna and mayonnaise", the fibres in the render certainly made it different to work with than I had expected. With cement render, it is usually put on and left for about two hours before it is floated again. We did this with the hemp render, but two hours was probably too long. The stiffer mix was too hard to push out anything but the smallest lumps. At Steve Allan's workshop he had suggested rubbing the hemp plaster mix back with a rubber glove, when it was partially set to bring the hemp fibres to the surface. He was using a different render mix, that had large hemp fibres and no sand. We tried this out, but using the AHMC render mix this brought out too much of the fibre and I prefer just a floated finish.

Test patch of render
Render rubbed more at top of the patch than bottom
 Our rendering was a bit lumpy, but with some depth guides and a bit more practise I think we can get an acceptable finish. I would still like to get some lime rendering lessons if I can find someone willing and able to teach us. We will not be able to tell the colour until it is dry, but I have sourced some yellow river sand a bit further away, but if it gives us a better colour without having to add oxide it will be worth a couple of trips with the trailer. We will try this sand next time we are on site.

Meanwhile work on the ceiling continued. We returned the broken panel lifter, the problem was very obvious and they exchanged it for a new one. The paint job on the new panel lifter is a bit patchy but the mechanics seem fine. We put ti to use finishing the second bedroom in which the last ceiling panel had to fit into a recessed section over the door that had walls on three sides. This was tricky, but after cutting a little off two of the edges it fitted acceptably well.

Ceiling in second bedroom
Work then progressed to the last of the bedroom ceilings. Following the line of the eave rafters a ceiling board would have ended just short of the built in robe. The robe was also 10cm narrower than it should have been, another mistake by the framing company, but too difficult to fix now that the frame is all up. The solution was to add some extra blocking behind the ply ceiling boards so that the end board lines up with where the ceiling abuts the robe wall. The brick pattern was continued for the ceiling in the largest bedroom even though this meant that every second row had two small boards on each end. The alternative of one big straight line down the middle of the room would have looked odd and shown up any slight difference in the spacing of the boards.

Ceiling in largest bedroom

Tuesday, 12 March 2013

Lock up and plywood ceiling installation

The excitement that we are at lock up is tempered by the knowledge that this means we are about half way through the building process. On Thursday the boys from Rylock came down from Sydney with the double glazed units for the three panel sliding doors, as the doors were too heavy to be installed with the glass in them. Unlike the windows the glaziers were on time, they put the glass in and checked all the locks and opening mechanisms on the windows and by lunchtime we were at lockup.

Glazing in progress
After lunch the 9mm BB grade Austral Ply Hoop Pine plywood arrived from Huskisson Plywood.  The ceiling in the back bedroom had the sheep's wool insulation installed and the joints between the boards painted black ready for the ply to be put up. We cut them to size and painted the edges of the ply sheets black. Where the ceiling abutted the hemp wall I routed a 9mm wide by 5mm deep channel 10 mm in from the edge and painted this channel black, this was so that when we put the 10mm of render on the walls it will come to the edge of the black channel and look like the expressed joints between the sheets, but we will have a fixed edge to render up to.

We lifted the sheets up using a panel lifter purchased from e-bay, we had to get the 16 foot lifter so that we could use it to reach the high ceiling in the main room, but the larger lifter proved a little awkward in the smaller rooms. We did not want large screw holes in the ceiling, that would be obvious even if covered with putty, so we put the ply sheets up with glue and brads using a fix out nailer. My research showed that for a timber to timber joint Bostick Ultraset SF, which is a flooring glue, would be suitable. We bought the glue in sausages and applied it with a sausage gun in a zig zag pattern to the the joists on the inside of the sheets. We put brads in at 150 centres around the edge of each sheet and at 300 centres across the rafters passing through the centres of the sheets. The sausage gun was a breeze to use compared to my stiff old caulking gun, but the flooring glue was not meant for ceilings and was a little runny and if put on too thickly or insufficiently pushed on to the joists it dripped off. The suggestion that I put it on with a 3mm v notch spreader was impossible on a ceiling and abandoned in favour of a simple zig zag pattern. The fix out nailer was fast and east to use and a great way to attach a ceiling. The holes it left were very small, but the brads held the ceiling while the glue went off.

First piece of ply held up by the panel lifter
Applying the glue with the sausage gun
Experience showed that it was best to test each ply sheet to ensure that it fit before putting the glue on, this was after one piece had to be recut after we had put the glue on the rafters and found it did not fit in. We used 9mm spaces to try to get even gaps between the sheets. In reality some of the gaps varied a little, but a 9mm gap was wide enough to hide small variations.

First ceiling done with express joints
The first ceiling done we moved onto the next room, following the same process of blocking out between the rafters where the ply joints would be, painting the blocking and rafters behind the joints black with Resene No VOC paint, putting in the sheep's wool insulation, adding a few staples where the batts did not want to stay between the joists, measuring and cutting the sheets, which was more difficult as some of the cross rafters were not straight and painting the edges of the sheets black. We left the sheets of ply unfinished hoping that the hemp walls will prevent any mould forming on the ply, which appeared to be the only problem with leaving them unfinished.

Stapling in some of the insulation
The first sheet of ply we put up in the second room did not seem to fit. Thinking we had made the hemp walls crooked I got out my angle grinder and trimmed a little off the top corner of the wall only to discover that I had cut the sheet crooked by 10mm. The only good thing was that we discovered that the walls are really strong, but could be cut using a masonry disk on an angle grinder. After this things seemed to be going better until disaster struck. Putting up the last panel for the day the cable in the panel lifter broke and the 3/4 of a sheet of ply fell down. Thankfully we were not hurt and the sheet of ply was not damaged but the panel lifter was beyond help, the broken cable being somewhere in the mechanism that could not be seen. Before I bought the panel lifter I had checked out reviews of the panel lifters on e-bay and most people were happy with them, so I was hugely disappointed that ours broke on its second day of use. Lets hope we can get a replacement.

Since we had glue on the ceiling we then tried to put up the ply sheet by hand, it was heavier and harder than expected. The sloped ceilings made it very hard to push the ply up to the higher side and trying to get the 9mm gap right and hold the ply sheet at the same proved impossible. I thought we had got it in the right place and started putting the brads in only to find out it was way out on the other side where neither of us could see. With about half the brads put in we had to remove the sheet. It was hard work putting the ply sheet down, some of the brads pulled through the sheet while a few were pulled out in the sheet. Thankfully the sheet did not break and we wiped as much of the glue as possible off the back of the sheet and off the rafters, so we could try and put the sheet up again once we have a working panel lifter.

Ceiling in the second room, up to our unexpected stop
Broken cable on the panel lifter


Tuesday, 5 March 2013

Windows Installed

A mini tornado lashed parts of the south coast the previous weekend and upon our arrival at Culburra we were greeted with a big Eucalypt branch on our back gate and garage.
Fallen branch
We had arranged for our windows to be delivered Friday, with an estimated time for arrival of 1.30pm. It was raining Friday morning and a 7am call from Rylock gave us the opportunity to cancel the window delivery. I took a gamble that the rain would stop and had the windows delivered.

We spent the morning covering up the polished concrete floor. While we had been away from the site, Henry and Adrian from the Dayman Group came in and gave the concrete floor a further grind and applied a water based acrylic finish. The finish was more reflective than we expected, so it is a good thing we only chose the satin finish. We did not want to damage the finished floor and so covered it with black plastic and some sheets of OSB to protect it while we did the internal linings and rendering.
Polished concrete floor
Close up of the aggregate in the floor
I was expecting a call advising that the windows were leaving Sydney as I had arranged for Rodney, my window installer to be on site at 1.30pm to unload the windows. I had to delay them about 1 hour after I called up Rylock at 11.45 to see where the windows were only to find out they were to leave Sydney in about 1/2 an hour. Then with news that the truck left Sydney at 1pm. I arranged for Rodney to be on site at 3.30pm, as the trip from Sydney is about 2 1/2 hours. Rodney arrived on time, but no windows. We waited, made phone calls and waited some more and at 5.15pm the windows turned up. Rodney, Joe and Tom worked until 6.15pm on Friday night unloading the windows. The window installers plan to start installing the windows on Friday afternoon was not to be.

Unloading the windows
Sliding door stacked in the house ready for installation
Rod and Joe started early Saturday morning and by late on Saturday all the windows and sliding doors were in. The integral hardwood timber reveal in the Rylock windows made it easy to install the windows in the hemp walls, as they could be screwed to the timber frame in the centre of the walls through the reveal. The installers used plastic shims in different millimetre thicknesses to level the windows. The doors were a little trickier as they were set down in the concrete which was not always perfectly level. The doors ended up having the tracks a few millimetres above the concrete, but this will work out well as it is not big enough to trip over but enough to stop the dust and dirt falling straight into the sliding door tracks.

Sliding doors fill the big empty holes
Windows make the building look more like a house
The windows are a mid grey colour called Windspray, however in the photos the windows still have protective black tape on them from the factory. The windows have about a 20mm gap all around, which was required to be left to install them. We will probably fill this before we finish the walls with 10mm of lime render. The window installers recommended creating a small groove between the render and the windows and filling with Sikaflex to prevent cracking at the joint as the Aluminium windows will expand and contract with changes in temperature.  They also recommended filling the small gap on the inside between the polished concrete slab and the sliding doors with black silicone sealant so that it does not show up against the floor.

Upper windows match sliding doors
Diagonal windows in hallway
Double horizontal windows in the bathroom
While the windows were being installed we started on the ceiling. The ceiling will be made of plywood with the joints between the sheets expressed with a 9mm shadow line. The long end of the sheets goes across the joists and the joints are all on the joists, but in the opposite direction I had to add timber noggin behind each of the joints. I offset the joints and painted the timber behind them black using Resent VOC free paint. This gave a nice matt black finish. We then started installing the sheep's wool insulation.

Rafters and noggins behind joints painted black
Insulation being installed