Sunday 23 December 2012

Cracks in the Concrete


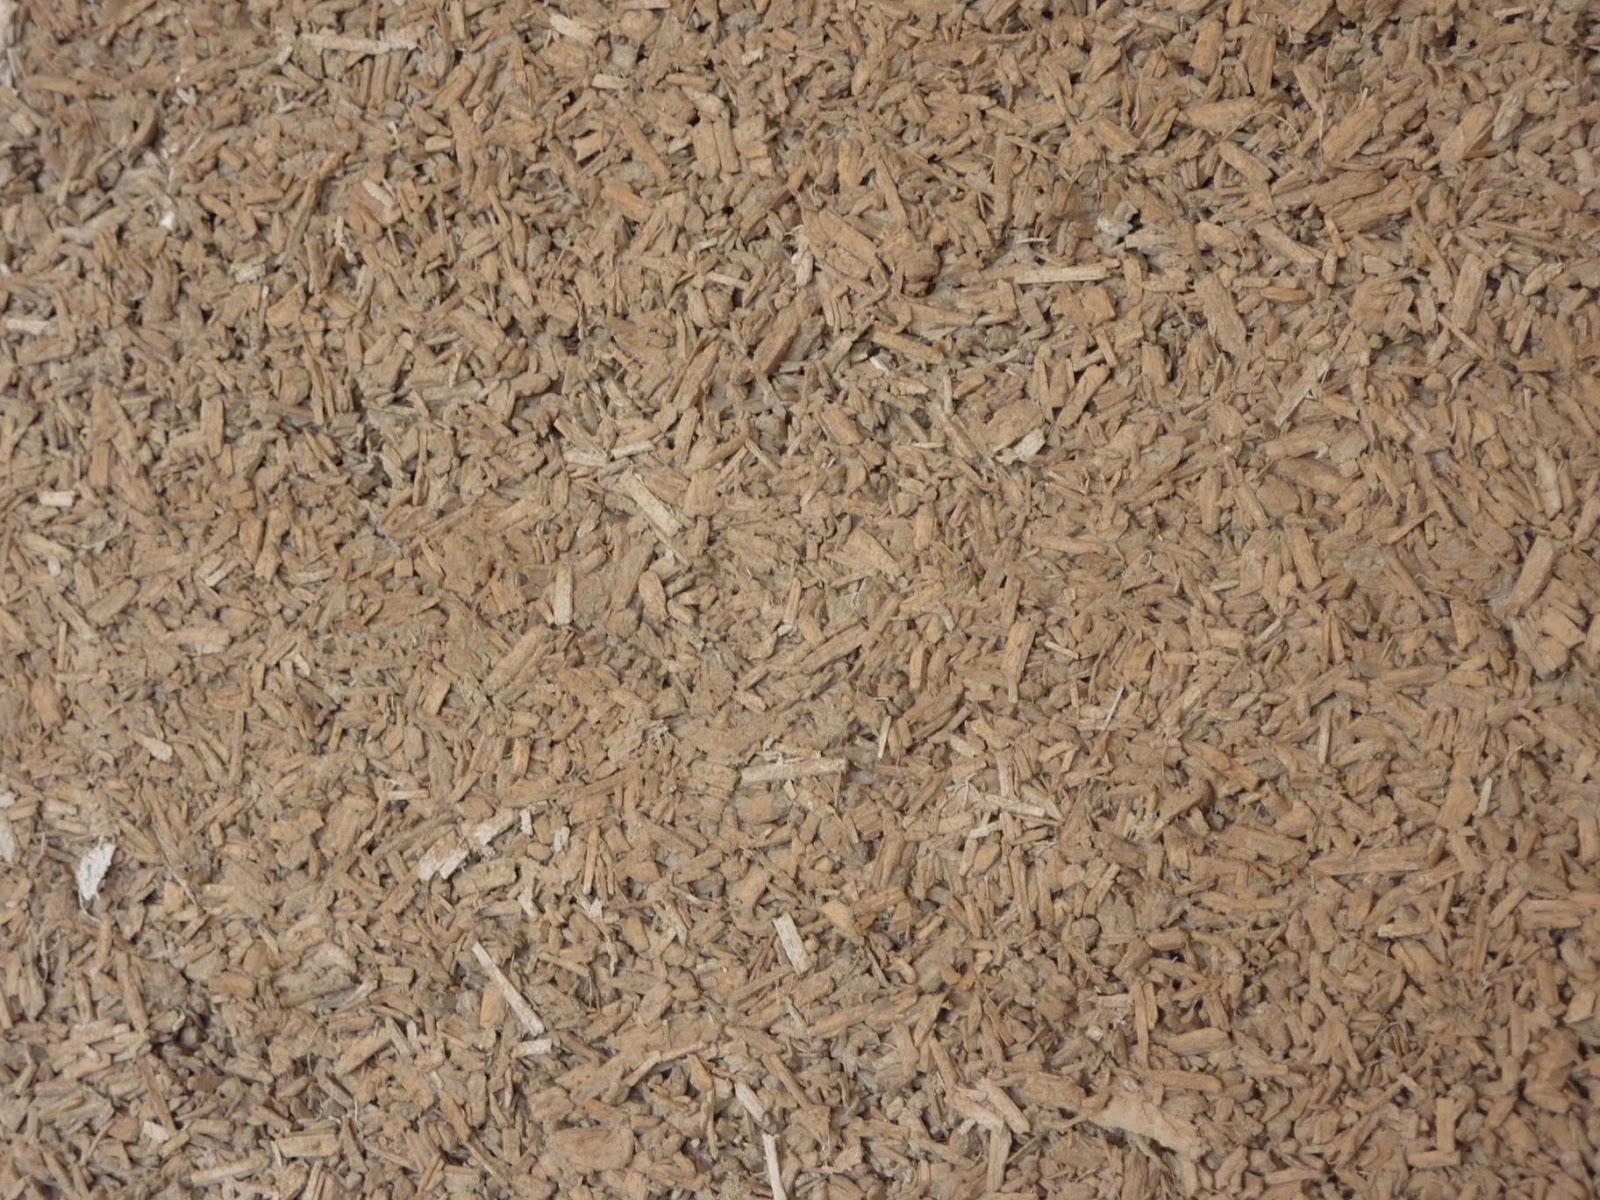
Despite using 32MPa concrete, we have cracks. So far it looks like there are cracks in the larger sections of concrete approximately every metre. We can only see the edge of the slab and where there are door openings because we have covered the floor with plastic and boards to protect it while we build, our walls also cover most of the top edge of the slab. So far we cannot tell how far across the slab the cracks go, but the cracks go right through the outer edge of the slab. We were warned from several sources that it is in the nature of concrete that “it cracks”, but I hope that the cracks are not too obvious in the final finish of our polished slab.

Crack down the outer edge of the slab
Crack on the top of the slab
We have joined the owner builder sharing merry go round. On the take side, Tony and his owner builder mates have kindly lent us a couple of pieces of scaffolding. Now that we are building walls over 2.7m high the scaffolding is immensely helpful. With no noggins in the way, working on the scaffolding was almost as easy as working on the ground again, with the exception of having to climb up and lift buckets of hemp onto the scaffolding. On the give side, we have passed some excess OSB boards on to owner builder Nicole for her to use as form work for her hemp building project.

Bathroom window openings finished
The very useful scaffolding
 We now have the tricky task of working at head height under the roof, finishing off the top layers of the walls. This is difficult, particularly in the bathroom where the rafters are only 150mm deep. It will make us appreciate the 250mm rafters when we get back to working under them. However, once we realised that we could do the work by feel and did not need to look down into the form work it became easier.  The joy, after doing this work, was taking the form work down for the last time.
Finished to ceiling height under 150mm rafters

Hemping around the parapet wall where the lower front pavilion roof meets the vertical wall of the main pavilion was tricky, mostly because there was a a section that will be in the ceiling space of the front pavilion, but is the back of the wall of the main pavilion that we could not get any form work into and ended up stuffing the space with a piece of Formex left over from the concrete joint.

Parapet wall with black Formex filling gaps between the pieces of form work
Thoughts and organisation have moved on to the next stage of the process and I have ordered my plywood ceiling lining from local company Huskisson Ply – their price was good and delivery is only $20. After researching the performance, properties and price of various ceiling insulation I have chosen to pay a little extra and go with sheep’s wool insulation. My final choice was between the sheep’s wool and recycled polyester. Finding out how sheep’s wool insulation could deal with changes in moisture and that it was a natural product were the determining factors in deciding to go with the sheep’s wool. 

I found a good price through an on-line building supplier, but the insulation was coming down from Queensland and the cost of freight was almost as much as the cost of the insulation. So, I contacted the manufacturer, Higgins Insulation, whose website indicated that they sold the same insulation at an only slightly higher price than the on-line seller and the insulation could be picked up from their Sydney warehouse. It turns out that the Sydney warehouse did not have enough in the R-value and size I needed, so with the offer to get 3.5 for the same price as 3.0 I now have a mix of each and in 580mm wide and 430mm (which cut in half will make 580).

I will use the 3.0 in the main pavilion as it has higher ceilings and the best ventilation, to make use of cooling breezes in summer, and the most amount of north facing glass, so I hope it will warm up well in winter. The rest of the house will have 3.5 except the hallway which has 90mm rafters. I am yet to work out the best form of insulation for the hallway but suspect it may have to be some sort of expanded polystyrene, in order to get the same R-value in a thinner material. 

I will be using Magnesium Oxide (MgO) board on my internal cavity walls and then rendering this with the same 10mm of lime based render as the inside of the external walls, to give the walls a consistent finish. The MgO Board will be coming down from Quantum X in Queensland as a distributor in Sydney from another company could only supply 10mm or 12mm boards. MgO Board is not manufactured in Australia, but in my view is a greener option than fibre cement or plasterboard and I will render it with the same lime based render I am using on the external walls so you will not be able to tell the difference between the external walls and the cavity walls.

Thursday 29 November 2012

Parapet walls and tricky formwork

Last weekend we finished another wall up to ceiling height - the back wall of the main pavilion. This wall abuts the roof over the hallway and I knew it would be a difficult section. The over flashing for the hallway roof is already installed and finishes about 55mm- 60mm from the frame, the same distance that my form work needs to be from the frame. This meant that I had could not fit the form work sheet at the required 55 mm distance out from the frame. I trimmed one of the battens from the hall roof by awkwardly sawing upside down, then fitted the timber form work as close as possible and filled the gap with a bit of left over Jointex (stiff joint) from my concrete slab. The lightness of the hemp meant that the Jointex that was just wedged in place was not pushed out when the hemp was tamped.
Form work around parapet wall
Jointex filling the gap in the form work
Form work well fitted on top of over flashing
Some heavy rain and no downpipes meant that the rain and mud, under where the down pipe will be, splashed up on the hemp wall. The water did not soften or damage the hemp wall at all and it remained as hard and solid as the other walls.

Rain and mud splashed on the external wall
Completing the back wall meant working up to ceiling height. With our experience from the first wall we did this on, we did the last part of the wall in three stages. Firstly filling up to where our arms could just get into the form work, then raising the form work up to the full final height on the outside and just below the bottom of the top plat on the inside. We then filled under the top plate and up to the top of the top plate on the outside of the wall. Finally we moved the inside form work up to ceiling height and filled the remainder of the wall, going over the top of the top plate as the cut away in the eaves rafters has meant that the outside of the wall finishes above the top plate.

Filing under the top plate

As well as finishing the back wall of the main pavilion we did more work on the small sections at the front of the house and around the front door, which is yet to have the roof above it finished.

Completed back wall from the outside
Completed back wall from the inside
Front of the house taking shape
Front door

Wednesday 14 November 2012

Final hemp walls started

Hemp walls now done on front of house
While the rest of the house was done up to door height, four small sections near the front door and large glass sliding doors had not even been started. Over the weekend we did two rises on each of these small sections, so now all the walls have been started. It was odd going back to the beginning and putting down the damp proof course and tamping into the set down in the concrete, but seemed much easier now then when we first started. The small sections were left to last as we tended to prioritise the long runs, but with lots of studs and noggins, and corners on three of the four sections, the sections may have been short but were very fiddly to tamp. Our friends, Ann and Will, helped the fiddly sections go up faster, while their children Daniel and Alexander kept our son well entertained.

The last sections to be started
 We also had to remove a section of concrete, now in the set down for the glass sliding doors, due to an error in the frame construction. It was nerve racking cutting into our beautiful concrete slab, trying not to damage our polished concrete floor, but with a new masonry cutting wheel on the angle grinder the cutting went smoothly. My fear of cutting into the steel reinforcing in the slab, came to be with a small section of steel being exposed. The circular wheel on the angle grinder could not cut a square corner so the last section was removed by hand with a hammer and chisel.

We had been concerned about the hemp sticking to the tall thin section between two glass sliding doors, as the section was just solid studs with no section where the hemp could meet up with that on the other side. We attached two of the bent up left over fascia brackets to each side of the column in the first rise and, on the side where there was no conduit, also in the second rise. Hopefully this will keep the hemp attached to the frame.

Tall thin section

Forming up began to get difficult as we reached the section where the wall with the hot water service intersects with the hallway roof. With some very tricky cutting we managed to put the form work up to half way through the roof intersection.

Back wall of the main pavilion


Sunday 4 November 2012

Hemp walls up to door height

After another successful weekend of work almost all of our walls are up to door frame height (2.1m). On Friday with the help of some friends we set a new record of 17 mixes in half a day. Novice builders Sara and Alli picked up the methods of hemp wall building very quickly. Plus on Friday we had the added help of now experienced hemp builder Nicole, who is soon to start making the walls for her own hemp house, together with her builder Noel. Nicole will be able to learn from our successes and mistakes and will no doubt learn some new things from her own build, as every build is different, depending on the design, location and materials used.

Looking from the back toward the main and front pavilions
An all female effort on the new rise near the hot water system
Bathroom windows take shape
Bathroom and side wall
View of front pavilion from the north west

The lower of the two fresh rises was proudly another all girl effort
Largest section of wall uninterrupted by openings
Walls go up around kitchen window
View of hall and kitchen
As the walls have got higher we have had to move from working on a plank on crates, to a plant on trestles and hopefully soon we will be borrowing some scaffolding. As we start to work higher toward the roof moving the form work is becoming more difficult, two people working either side of an 8 foot ladder is the current solution, but very soon even that will not be high enough.

23 mixes on Saturday has brought out total to date to 290 mixes. Fine weather, warm water and a swim rewarded our hard workers on Sunday.

Sunday 28 October 2012

Removing and rebuilding hemp walls

During our absence from the building site for almost three weeks there was a severe storm and a large branch from a neighbour's gum tree fell onto the fence and into our yard. The fence was dented, but thankfully it missed the house - one of the reasons we deliberately did not locate the house under the gum trees. The storm also moved the hardwood pallets off the plastic they were holding down covering the pallets of binder. The pallet fell into the hemp wall but hardly damaged the wall, leaving only a 3mm deep line where it hit the wall.

Fallen tree branch and dented fence
The walls of the drier mixes we had done had been left to dry for three weeks, but were very soft and crumbly. Further inspection showed that the dryer mix had not solved the problems of the hemp wall pulling away from the timber frame around the doorways or the cracking. The dryer mix had both vertical and small horizontal cracks, however there was no cracking between rises, showing that wetting down a bit more between rises made a difference. The problem with the dryer mix was that it appeared that it had not bound together properly, when you ran a hand across it, in parts, the wall just crumbled away. The top of the window sill was also loose and crumbled when touched. This was in contrast to the wetter mix that had only been done the week before which was solid and did not crumble at all. Some parts of the dryer mix wall were more solid than others, but the mix where we had used 10 litres rather than 9 litres of water was more solid and much less crumbly than the 9 litre mix, although it was still weather than the wetter mixes we had done.

Video providing a comparison of the walls.

Horizontal crack mid rise in dryer mix
Vertical crack in dryer mix
Vertical crack in wetter mix
Marks showing where the wall has crumbled when rubbed
Worried that the render would not be sufficient to hold together the crumbly walls with out cracking we decided to demolish the walls we did with the dryer mix and redo them with a wetter mix. The ease with which the walls were able to be removed confirmed that we made the right decision to demolish them. It was also very obvious when we got the the walls that had been made with the wetter mix, they were hard and we could not easily remove them by hand.

Wall removal
Wall material taken out
 It had taken one day, 17 mixes, to do the dryer walls. It took half a day to remove the section and another day to rebuild them, and with the extra half a day we had we did the next rise in the main bathroom. This time we used an in between mix of one and a third buckets of water. Not as wet as our previous mix of one and a half buckets, but wetter that the too dry one bucket mix. This time we also made sure that we sufficiently wet down the joint between the rises. We used a child's watering can.

Kitchen wall redone
Wall solid even when form work just removed
New walls done too
 I followed Rodney Gregg's recommendation and got some washers used to attach Styrofoam and used these to put screws in to pull the wall back in where it had pulled away at the door edges. A large chain hardware store did not carry the washers, so I looked on the Internet for Styrofoam walling suppliers. Just when I thought I would have to drive a long way or get the  mail order. I found on the Internet that Culburra Beach Hardware was a distributor for Ezywall Styrofoam products, one of the accessories for which are the plastic washers I needed. So I purchased a box of 500 and have using them to pull the walls back to the studs where they have come away. It has worked a treat.

Ezy washer and screw
Hemp wall pulled in to stud
Wall pulled back in


Saturday 20 October 2012

Visit to Tasmanian Hemp House built by Rodney Gregg

A work conference in Tasmania provided me with the opportunity to visit Roger Bodley’s hemp house on the north coast of Tasmania near Wynyard. Unfortunately Roger could not be there as he was attending the 3rd International Hemp Building Symposium in Switzerland. However his builder, Rodney Gregg, kindly showed me around and gave up hours of his time to speak to me about hemp building, giving me renewed hope and confidence in our build after our recent problems.


View from the approach to Roger's house
Roger's house showing the ocean view
Roger’s house is built on a steep site with uninterrupted ocean views of Bass Strait. Hemp has been used extensively in the walls, floor and ceiling. For the floor a magnesium board was attached to the underside of the floor joists, the area between the joists filled a light hempcrete mix and the beautiful Blackwood timber floor boards attached over the top.  The magnesium board is vapour permeable, enabling this characteristic of the hempcrete to be retained. The walls of Roger’s house were, at about 350mm, almost twice as thick as in my build. They also did not have noggins to contend with, they are unnecessary in a hemp house as the hempcrete once dried will provide the necessary resistance to lateral forces (my Council would not accept this). 

Rodney and I compared our hemp building work methods, although he was working on a much larger scale that I am. In parts the walls of Roger’s house are two storey’s high. Rodney had his own scaffolding and put this up around the house, then formed up the full height of the external walls using Formboard with external stiffening timbers that Rodney usually uses for casting suspended concrete slabs.  He then formed up and poured 600mm rises on the inside. The chop of hemp he was using from the UK was much finer than the hemp I am using from Ecofibre, and finer than the hemp I used at Klara Marosszeky’s workshop (in which was a chop finer than the Ecofibre hemp). They had some issues in working out how to mix up a sufficiently large volume of hempcrete mix and ultimately used a concrete truck to mix the hempcrete. This is not a solution Rodney would use again as they had to make the mix wetter than they would have liked to enable it to tumble in the mixer and not just get stuck to the sides. They put in and tamped a 200mm thick layer of hemp at a time. Despite their layers being much thicker than mine, I am doing layers of about 50mm, in an unrendered section of wall in the garage the tamping looked even and you could not see definite lines between the layers. I suspect that this may have to do with the finer chop of the hemp allowing thicker layers to be placed and tamped. I was reassured that Roger’s finished wall did not look different to mine, except for the size of the hemp.
Close -up of unrendered wall
Unrendered "truth" wall in the garage
Fine chop of the hemp
Once the walls had been placed they used more magnesium board as a ceiling lining, leaving the bottoms of the timber I-beams exposed in the main living area, as a decorative feature. A light hempcrete mix was then placed between the roof beams, the sarking installed and the Colorbond decking style roofing material was placed on top. 

Rodney showed me the binder and render they used, all of which was imported from Europe – the binder was the UK Tradical binder, it was a very fine almost slippery lime based powder, it did not look like it had any sand in it and did use any added sand like the AHMC binder I am using. For the renders he used one type of render, done in three coats by a professional renderer on the inside and three coats each with a different product on the outside. The internal render was a very fine lime based powder and each coat was quite thin. The external render was much thicker and Roger had wanted a textured finish on the outside, so one of the external coats looked like it had little polythene beads in it, that created this finish. I can not recall the product used but it was imported from Europe. The need for a special external render on Roger’s house may have come from the absence of eaves and the driving rain and wind that would come straight off Bass Straight in bad weather. Thankfully I was there on a beautiful day.
Detail of external textured render and curves around windows
The day was sunny with cloudy patches and a gentle breeze, but the inside of the house was warm but not stuffy. It had a soft comforting feel that is hard to describe. The large rooms were not echoey but at the same time sound was not overly dulled. I could not tell whether this feeling came from the hemp walls themselves or the gentle curves in the corners of the walls and the ceiling, but it was very pleasant nonetheless.  

Main living area
Upstairs bedroom with view
I was also impressed by the use of timber in the house, the beautiful timber stairs showing the natural edge of the log, as well as the custom made Blackwood timber doors and door jambs. The timber work in Roger’s house has inspired me to make my own door jambs – I just have to source some nice timber. Roger’s house also used Aluminium framed windows. I was very happy to see this as I am also using Aluminium framed windows, whereas most other hemp houses I have seen in books and on the Internet use timber framed windows. The finishing detail on Roger’s windows was a little different to the approach I will take as his walls are thicker than mine, but I was pleased to see that the Aluminium framed windows did not look out of place.
Lots of windows facing north and the views
Curve of the house matched the curve of the slope
I asked Rodney lots of questions about construction detail and how different materials could be used in conjunction with hemp walls. Rodney generously and patiently answered all my questions and i think I will have a better house because of it. Roger’s house does not use any skirting boards and I will do likewise. I had been worried about my internal door jambs detail and how to joint the plywood I had intended to use for my internal wall linings with the renders hemp walls. Both matters were solved by switching the internal wall lining to rendered Magnesium board, so I could (try to) replicate the lovely rounded corners in Roger’s house and bring the render up to the edge of my door jams. 

Rodney also introduced me to renderers mesh and recommended that I place it in the render at any stress point, such as above the corners of doors and windows, to prevent the render cracking. I could also use it over the sections where my hemp wall had cracked to prevent any movement in the render. Rodney also provided me with a method to rectify the sections of wall that had pulled away from the stud using a large round plastic anchor disk, normally used from attaching polystyrene, and a long decking screw. I will definitely obtain the necessary materials and try this out. He also shared with me his neat method where extra keying in was required. It involved the attachment of a piece of timber shaped like a wedge with the tip cut off. This could then be attached to a stud or lintel and the hempcrete would key into the narrower end of the wedge, with the wider end holding the mix in. We also discussed parapet wall detailing and flashing – he cut a 25mm slit into the hemp wall, slipped the top of the roof over flashing into the slit, then sealed the slip with some silicon and rendered over it all.  

I am indebted to Roger for opening his house to me and Rodney for his time and sharing his experiences. It is this kind of sharing of knowledge that will support the growth of a hemp construction industry in Australia.