Wednesday, 7 August 2013

Front Door and Roof to Wall Flashing

On the way down to site I stopped that the hardware store and met a friend at the hardware store. My front door was strapped to the roof racks of the car. She said to me "Are you going to put the front door in yourself?" "Yes" I replied and I did just that. My only previous door hanging experience was from a shed so I was a bit concerned about my lack of experience. My solution was to hand the door first then build the door jamb around it.

I bought the front door some months ago from The Door Shoppe at Richmond NSW. A shop that is only open on Saturdays and sells discounted, seconds and end of line doors. I finished the door with three coats of Cabots water based acrylic clear finish. Then installed the Lockwood Nexion all in one handle and lock. The instructions for the lock were easy to follow and this first part of the lock went in well. Next I used my sharp brand new chisel to cut out the housing for the hinges. It was worth buying a new chisel for the job as it made the work much easier.

I used Tassie Oak for the front door jamb as I had for the rest of the door jambs in the house. However Tassie Oak is variable in colour and the first batch I got was a medium warm brown colour similar to my window reveals, the next batch was a lighter brown but the timber I got for the front door was very light. The colour combination is not quite what I expected, now the door frame will be closer in colour to the rendered walls than to the door.

I measured the location of the hinges on the hinge side of the door jamb, remembering to leave a 5mm clearance at the bottom of the door, and chiseled out the housing for the hinges before I put the jamb up. Even taking into account the width of the jamb there was going to be way more room in the door space than the door and jamb could fill, so I attached a strip of 20mm to the hinge side of the door opening before I attached the jamb. After checking several times with the level the jamb went in easily and the door was able to swing on its hinges.

Hinge side jamb in place
Next came the closing jamb, where the only tricky park was finding timber the right width to use as blocking between the frame and jamb. Since the jamb on the lock side was much further out than on the hinge side I could not use the nail gun to attach it and resorted to some long screws. The top of the jamb was even further away from the frame and the long screws had difficulty going in, so this time I resorted to my favourite batten screws. The batten screw may have been a little bit too much as everything lines up neatly in the inside and I had tacked the top jamb to the side jambs with the bradder, but the batten screws were so strong that on the outside where the wedges I used to get the right distance for the blocking had not reached the screws bowed the outside edge of the top jamb up a little. Not a big problem as the door still close nicely and I got my 3mm gap between the door and the jamb right.
Lock side jamb in place
I then covered all my nails and crews and batten screws with the thinner pieces of the stops that were neatly attached with the bradder (fix out nailer). Disaster nearly struck when putting in the striker plate for the door lock. I snapped a screwdriver bit and the tip broke off in the screw while it was half way in. I could not get the broken bit of the screwdriver out of the head of the screw and could not get the screw out. The screw was stuck right where the tongue of the lock needed to go. Desperation called for invention and I got the thin disc on thee angle grinder and cut a new slit in the screw head. This now fitted a flat head screwdriver nicely. Not only did I get the screw out, after making the pilot hole bigger I was able to put the screw back in. I now have a nice lockable front door.

Finished front door
The damaged and fixed screw
Unexpectedly the scaffolding was still on site and I got a good close up look at the parapet flashing between the roof and the walls. The overflashing that covered the apron flashing had been cut into the hemp wall and attached with roofing screws. Under the upper windows it also left only a very small piece of wall about 25mm high that will make for some interesting rendering problems.

The overflashing was very close to the upper windows
Overflashing held to wall with roofing screws
Overflashing cut into hemp wall
Joint between clad section of wall and hemp wall

Sunday, 28 July 2013

Awning Roof Goes On

Just over a year ago the roofing went on the main sections of the house and now the awnings have received their roof and guttering. We needed scaffolding again for this work to be done. It was an annoying expense, but as I was keen to have the professional roofers do the work so that I do not get any leaks, I had to provide them with scaffolding. I contacted Andrew again from Access Scaffolding at Wollongong and he sent his crew down to put up the scaffolding on afternoon before the roofers arrived.
Scaffolding goes up for the front awning

And the back awnings
The roofing (and scaffolding) had been put off for two weeks due to delays caused by a week of heavy rain in the Shoalhaven, so I was keen for it to all go smoothly. The day the scaffolding went up I phoned the roofing company, Kiteley’s, to confirm they were all lined up for the following day, only to discover at this late stage that they had booked the fascia and gutter to be done Friday and the roofing on the Monday. I wanted to be on site to discuss with the roofers the flashing of the awning roof into the hemp walls and quickly had to rearrange work and family to be on site on the Monday.

I had originally not wanted to have guttering on the awnings, in an effort to make them visually and actually lighter and because we have no storm water and any excess water, not diverted to the water tank, had to be dealt with on site. I also did not want the heavy look of downpipes coming off the awnings. But my concerns about the decks under the awnings rotting from the constant dripping from dew and rain caused me to change my mind and get gutters. I have also decided to use rain chains from the awning gutters and make a feature of and incorporate the use of the water in the landscaping.

The metal fascia and gutter, in Windspray colour to match the other gutters and window frames, started to go up quickly Friday morning, but rain threatened. It sprinkled with rain, stopped and sprinkled again, then a brief shower made the materials too slippery to put up and the roofers put off the job until Saturday, when fine weather was predicted.

The roofers were back Saturday and the remainder of the fascia and guttering were attached, save for the awkward join over the entry area that was not a standard angle and required a different piece to the one that had been provided.

Metal fascia and half round gutters go on the front awnings
And the back awnings
 Monday a different crew of roofers arrived and shortly thereafter so did the roofing. Discussions were had about how to install the flashing where the awnings abutted the hemp walls. I thought it would be easy to chase the overflashing into the hemp as I had had no trouble cutting the hemp with an angle grinder. What I did not know is that on a brick wall they normally chase in a thin groove and slide the overflashing into this and this holds it in place. The groove cut in the hemp walls was not such a tight fit and after discussion of possible alternatives it was decided to try to use silicon to try to keep the overflashing attached to the hemp wall and to have that flashing set in from the finished face of the render so if any water ran down the walls it would drip off the bottom of the render rather than running along the flashing and into the wall.

Some last minute work was needed adjusting the ridge over the entry section. In order to get the minimum 5 degree fall in the roof over the entry and bathroom the framing company had come up with a solution to push the ridge back slightly from the junction with the wall of the main pavilion. This however caused problems for the roofing because a valley commenced at this junction and it commenced any higher there would be water running toward the hemp wall above that junction. The solution was to put the ridge in line with this junction and have a stepped ridge. I originally thought this would look awkward but quickly realised that because of the angles of the roof you will not be able to see it. To then do this all I needed was to add some extra timber for the moved ridge capping to attach to. 

The next problem was that, while I had carefully put in my valley boards and cut off my battens 20mm from the valley boards, I had forgotten to put in the valley battens. So I commenced trimming all the battens and putting in the valley battens parallel to and 20mm out from the valley boards. Being an unusual angle I had to measure all the angles for the valley batten. There are three valleys in the awnings, one over the entry and two either side of the hallway. The valleys over the hallway had the added difficulty of water pipes running through the ceiling that needed channels cut away in the rafters to allow them to fit underneath the valley battens. The temporary roofing over the back valleys were all taken off to put the battens in and then put back on again as the roofers had to come back the next day to finish the back section and the flashing.
Finally a covering over the entryway
The two different height awnings in Shale Grey colourbond
Looking down the awning over the main room
I am keen to see what the house looks like with the awning completed, without the scaffolding in the way, and to see how the flashing to the hemp wall has turned out.

Thursday, 25 July 2013

Ceilings and Internal Walls Completed

We had intended to do all the plywood ceilings in the house before the internal walls. However, over three ad a half months ago work on the ceilings stopped when we found that the remainder of our batch of BB hoop pine plywood had unacceptable blue stains. We took up this issue with the local supplier, Huskisson Ply.  After countless phone calls to Husskison Ply that were not returned, we even tried phoning the distributor Gunnersons. We were happy to swap the ply sheets for those without blue marks and even pay for the extra transport costs. After three months (!!!) I finally got a reply from Huskisson Ply that we could return the sheets less a 20% restocking fee. So we would only get back 80% of the cost of the sheets.

We resorted through the remaining 26 sheets of ply and measured and calculated exactly how many sheets we needed and the size of each sheet. We worked out that any sheets less than the full width we could use the back of the sheet, as many with blue marks on the front did not have them on the back, and cut off the manufacturers big purple stamps that were on the back of the sheets. Other sheets with only patches of blue marks we managed to cut around the marks, resulting in a bit more wastage as some sheets we could only use about 1/3 of the sheet.

In the end we returned 13 sheets, but due to careful measuring we only needed to purchase 10 new sheets. This made up for the 20% we lost on returning the sheets. We returned the unused sheets to Huskisson Ply ourselves as we needed to get them out of the house as they were in the way where we needed to finish the ceiling in the main room.

The new sheets came from Mister Ply and Wood at Penrith. I had dealt with Chris Carter from Mr Ply several times over the previous few years and should have got all the ply from them in the first place. Instead I chose to go with an unknown local supplier to save on transport costs and support local businesses where I am building. Since I was only getting 10 sheets I was able to pick them up and transport them to site myself, by trailer, saving transport costs. I was also able to go into Mr Ply and Wood and due to my previous poor experience they let me go through the sheets they had in stock and select the ones I wanted.

Main room ceiling half done
We are very happy with the result. The new sheets of ply have slightly less figure in the grain. In the bedrooms we love the interesting swirls in the ply, it was this unique feature of the wood that made us choose to do the ceiling in ply in the first place. However in the larger main room the less figure in the ply works better as it makes the ceiling less busy.

In the smaller rooms, such as the bathrooms, entry and hall we were originally going to have the black expressed joints between the sheets and put up the blocking and painted it black. However, when we realised that the smaller bathroom would only have one joint we realised that this would look a bit silly and decided to butt the sheets together with no express joint. In doing this I tried to match the machine cut joints together. I could not always do this, particularly where I was using the backs of the old sheets as I had to cut the manufacturers stamps off both ends. So I had to cut the ply very carefully and then sand the cut edge until it was perfectly straight, or as near as I could get it. Not doing the express joints meant that I did not have to paint the edges of the ply black, thus the ceilings in the smaller rooms went up quicker.

For the main room we also chose not to have a black border around where the wall meets the ceiling. This had worked well for the first two bedrooms we put the ceiling up in, but in the third bedroom one of the walls was not quite square and this upset the process of trying to get the black border around the room. This is something we will have to try to disguise with some creative rendering.

Butt jointed ceiling in the smaller bathroom
The ceilings in the laundry and top of the hall were covered in one sheet. This was very neat but required careful measuring as the frame along one of the walls in the back section of the house was not straight.

Ceilings covered in a single sheet
With half of the main room ceiling left to finish, illness in the family, looked like delaying the completion of the ceiling. With very good timing my mate Tony offered to come down and help out on the build for the weekend. Over two days the rest of the ceiling went up like a dream thanks to the panel lifter, the 9mm strips of timber used to measure the gaps, careful measuring and Tony's help. It was truly a joy to look up at the completed ceiling in the main room, reminiscent of Japanese Tatami mats on the ceiling.

Completed plywood ceiling
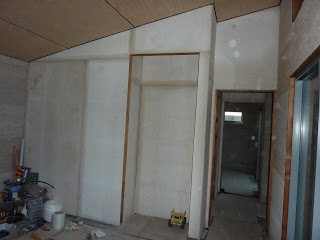
The internal wall sheeting had previously stopped short of the ceilings so that I could put the ceilings in first. With the ceilings done work continued on the internal walls. I had under estimate the number of screws required to put up the internal walls. The house does not have many internal walls, but some of the internal walls are quite high and the raked ceiling meant that none of them could be completed floor to ceiling in one sheet. The built in robes also required more sheeting that it first appeared. I initially bought from Nepean Boltmaster 1,000  x 30mm  and 200 x 20mm fibre cement screws. The shorter screws were for the sheets attached to the cavity sliding door units as the screws could not go through to the other side of the timber side rails of these units. I then bought 300 more of the 30mm screws. Then another 100 x 20mm and 200 x 30mm and a further 200 x 30mm to finish off the job. That adds up to 2,000 screws.

Almost 2,000 screws used
Internal in walls in bedroom and robe sheeted with MgO Board
Bedroom and robe MgO sheeting completed, in late afternoon sun
Before ordering the MgO Board I had done a rough drawing of all the pieces I would need and roughly worked out what pieces I could get out of each sheet. When I cut each sheet of MgO I cut the large pieces out first and worked out the most efficient use of the remaining piece. This way I used the MgO board much more efficiently than I had first calculated. I will have 8 sheets left over after I use one more for the bath hob. The left over MgO Board will be used for the ceiling of the shed I will build later.

Friday, 12 July 2013

Solar Connected

We entered into a contract with Solar Connections and the solar panels went on the roof on July 2012, however at this time we had no walls, only the timber frame so Paul from Solar Connections had nothing to attach the inverter to. The walls were completed in February 2013, but we wanted to render the walls first before the inverter went on. However, we ran out of time as the system had to be fully installed by 30 June 2013 to take advantage of the government incentives that were in place when we entered into the contract for our system, but ended in January 2013. On the first day John did some rendering I got him to do a patch of render on the external wall where the inverter would go. It turned out that the patch of render was only just big enough. On 24 June 2013, with a week to go, Paul put the inverter in and got the solar working. We then needed to get a Level 2 service provider to change the meter over so that we could record the electricity we generated.


Wayne from FAW Electrical, who had originally hooked up the power for us came back and added an extra meter to measure the electricity we export to the grid. Unfortunately we missed out on the government feed in tariffs for solar electricity generation, so we have what they call net metering. This means that if we use electricity we have generated it is not recorded on either meter. If we generate more than we use this is exported to the grid and recorded on the export meter and when we use electricity at night or when we are not generating enough electricity to cover our needs we use electricity from the grid and this is recorded on the normal import meter.  

John the renderer only had half a day to work on the rendering and got one of the internal walls of the front bedroom done. The timber window reveals that has been set 10mm in from the hemp walls provided good render stops  and the avoidance of having to use trim around all the windows gave the simple unfussy look we are after. Rendering down to the slab and up to the ceiling and creating neat edges at these joints was a bit more time consuming.

Wet render

As the wall dried it began to look a bit patchy. this is probably because of the slightly different moisture in the walls making the render dry at a different rate. We are not concerned as we watched this process on the render on the inside of the wardrobe and it dried to an even colour. The week of solid rain that the occurred immediately before the rendering of this wall probably made everything a bit moister than normal.

Partially dry render a week after being done
The wardrobe render was dry but had a wet patch on it probably from the several days of torrential rain the Shoalhaven area had, as the wall just outside this area was one of the few places that the eaves do not cover, this will be solved as thee wall will be covered when the sheeting goes on the awnings. It was hard to work out what colour the render was. In the early morning it looked quite yellow, but in the middle of the day the green plastic covering the rest of the windows in the room created an odd light. We reused the plastic bags the ceiling insulation came in to cover the windows. Although after many weeks of trying to get the right colour for the render, it is clear that the same amount, proportionally, of oxide in the mix has not resulted in the same colour we chose from our tests. It looks like we will just have to be satisfied with the colour we have got.

Windows taped up ready for rendering

Casting an odd green light
Wardrobe rendered
There were big seas in the wake of the winter storms, but watching the waves crash over rocks that normally stand proud of the water was awe inspiring and a great way to wind down after a weekend of building.


Wednesday, 12 June 2013

Hemp Lime Rendering Commenced and Nelligen Studio Revisited


A busy long weekend was spent,  finishing the wardrobe in the front room and putting on the door jamb and inbuilt pelmet for the curtain that will be the wardrobe door. I used Tasmanian Oak timber, as I had for the other door jambs on the house, cut to size to provide a render stop for the 10mm of render on each side of the wall. The ceiling and door jamb was then covered in plastic, reusing the plastic bags the insulation came in, to protect them from the render.

Our friends Martin and Nerida stopped in on an unwintery warm sunny Saturday with their chainsaw  and we cut up some very sizable tree branches that had fallen onto the block over the previous 12 months, most significantly the branch that dented the fence and the other that cut a hole in the back gate. They left with a trailer load of firewood , but not before I had roped Martin in to help me with the battens and valley boards for the awning over the front door. The tricky part with this was that the section of the awning over the front door only has two rafters, one of which is the valley rafter. Because we needed to put the valley boards in next to this rafter we could not attach the battens to it. Instead, we used left over material from the awning rafters to create perpendicular rafters that ran between the two rafters and on top of which we attached the battens. Over the rest of the weekend we finished the battens, valley boards and hip battens for the whole front section of the house. 

Valley boards and battens with extra support installed
Battens and hip batten installed
Being a long weekend we took a trip down to Nelligen to help our friend Nicole with her hemp walled studio. She had made good progress since we had last been on site. We spent the day helping her build the hemp walls along he south wall and above the stone foundation wall. The east wall above the stone foundation was originally to be made of stone but a change of plans after the frame was made meant that adaptations had to be made to change the originally 500mm walls to be partly 300mm and 500mm. The thicker walls used up the hemp very quickly.

Stone foundation wall and formwork for hemping

The west and part of the south wall are completed up to door height.

West wall
West and south walls
With all the different spacer sizes she was using, Nicole abandoned the use of spacers and instead used a level to ensure the formwork went up vertical from the lower measured section of the wall.

Formwork being filled with hemp
Sheet bracing filled on both sides
Permanent formwork around windows
Nicole's hemp came from two different sources. The first sections of wall used hemp from Ashford and the current sections she is making use hemp from the Hunter Valley. Although I also sourced my hemp from Ecofibre in the Hunter Valley it was very different from the hemp Nicole was now using. Her hemp came in compressed bales and was much finer than the hemp I got from the Hunter Valley and was even finer that the hemp from Ashford. Having worked with all three different chops of hemp, my current preference is for the chop from Ashford. The larger pieces of hemp from the Hunter Valley did not interlock as well as the finer chop, but the very fine chop from the Hunter Valley appeared to compress so much together that the walls seemed quite dense. The Ashford hemp seemed to be a balance between the two. However, I will reserve my final judgement until Nicole's walls are thoroughly dry and the properties of the walls using the different hemp can be better observed.
Compressed bale of Hunter Valley hemp
Wall using Ashford hemp
Wall using Hunter Valley hemp
Hunter Valley finer chop of hemp
Nicole loaned us he old cement mixer for our rendering and John the renderer came around to try out the hemp lime mix. John made up the mix a bit runnier that I had done the test samples, but that may explain why I had some difficulty applying the render on my test samples.

Hemp lime render being mixed
Render ready to go on the wall
Self adhesive fibreglass mesh was applied to the joints between the hemp and MgO boards.
 John first tried out the render on the inside of one of the wardrobes, the top section of which was a very awkward area to access. Perhaps this was not the best place to start, but it was an easy place to hide any mistakes that were made. John found the hemp lime render different to any other product he had used. He found that it was best to put the render on at as closest to the final thickness as possible, float it and them leave it. Floating the render again later, as is done with cement render just brought up the grains of sand and made the finish less smooth. Unexpectedly the render did not cover anywhere near the 5sqm advised by the manufacturer. When we next do a larger section of wall we will more accurately measure the square meterage covered by each bag of render. John was able to get the finish we wanted to achieve, a consistent but not completely flat finish, just like a traditional lime rendered building.

Render mesh applied to joints
Rendering the inside of the wardrobe
Awkward top section of the wardrobe
We need to get the inverter for our solar panels installed by 30 June, to take advantage of the government rebates that were in palace when the panels were first installed. So, John did a patch of render where the inverter will be placed. John was unsure of the best way to render the MgO boards and whether the render worked better with or without render mesh so he did some tests, doing a 10mm coat of render mesh, a skim coat on render mesh and the same again 10mm coat and skim coat without render mesh. The skim coat is a thin coat that is later covered with the finish coat of render. When dry we will be able to see which method provides the best adhesion.

Render patch for solar inverter
Skim coat and 10mm coat on render mesh
Top to bottom; skim coat no mesh, 10mm coat, skim coat with mesh, 10mm coat with mesh all on MgO board