Saturday, 20 October 2012

Visit to Tasmanian Hemp House built by Rodney Gregg

A work conference in Tasmania provided me with the opportunity to visit Roger Bodley’s hemp house on the north coast of Tasmania near Wynyard. Unfortunately Roger could not be there as he was attending the 3rd International Hemp Building Symposium in Switzerland. However his builder, Rodney Gregg, kindly showed me around and gave up hours of his time to speak to me about hemp building, giving me renewed hope and confidence in our build after our recent problems.


View from the approach to Roger's house
Roger's house showing the ocean view
Roger’s house is built on a steep site with uninterrupted ocean views of Bass Strait. Hemp has been used extensively in the walls, floor and ceiling. For the floor a magnesium board was attached to the underside of the floor joists, the area between the joists filled a light hempcrete mix and the beautiful Blackwood timber floor boards attached over the top.  The magnesium board is vapour permeable, enabling this characteristic of the hempcrete to be retained. The walls of Roger’s house were, at about 350mm, almost twice as thick as in my build. They also did not have noggins to contend with, they are unnecessary in a hemp house as the hempcrete once dried will provide the necessary resistance to lateral forces (my Council would not accept this). 

Rodney and I compared our hemp building work methods, although he was working on a much larger scale that I am. In parts the walls of Roger’s house are two storey’s high. Rodney had his own scaffolding and put this up around the house, then formed up the full height of the external walls using Formboard with external stiffening timbers that Rodney usually uses for casting suspended concrete slabs.  He then formed up and poured 600mm rises on the inside. The chop of hemp he was using from the UK was much finer than the hemp I am using from Ecofibre, and finer than the hemp I used at Klara Marosszeky’s workshop (in which was a chop finer than the Ecofibre hemp). They had some issues in working out how to mix up a sufficiently large volume of hempcrete mix and ultimately used a concrete truck to mix the hempcrete. This is not a solution Rodney would use again as they had to make the mix wetter than they would have liked to enable it to tumble in the mixer and not just get stuck to the sides. They put in and tamped a 200mm thick layer of hemp at a time. Despite their layers being much thicker than mine, I am doing layers of about 50mm, in an unrendered section of wall in the garage the tamping looked even and you could not see definite lines between the layers. I suspect that this may have to do with the finer chop of the hemp allowing thicker layers to be placed and tamped. I was reassured that Roger’s finished wall did not look different to mine, except for the size of the hemp.
Close -up of unrendered wall
Unrendered "truth" wall in the garage
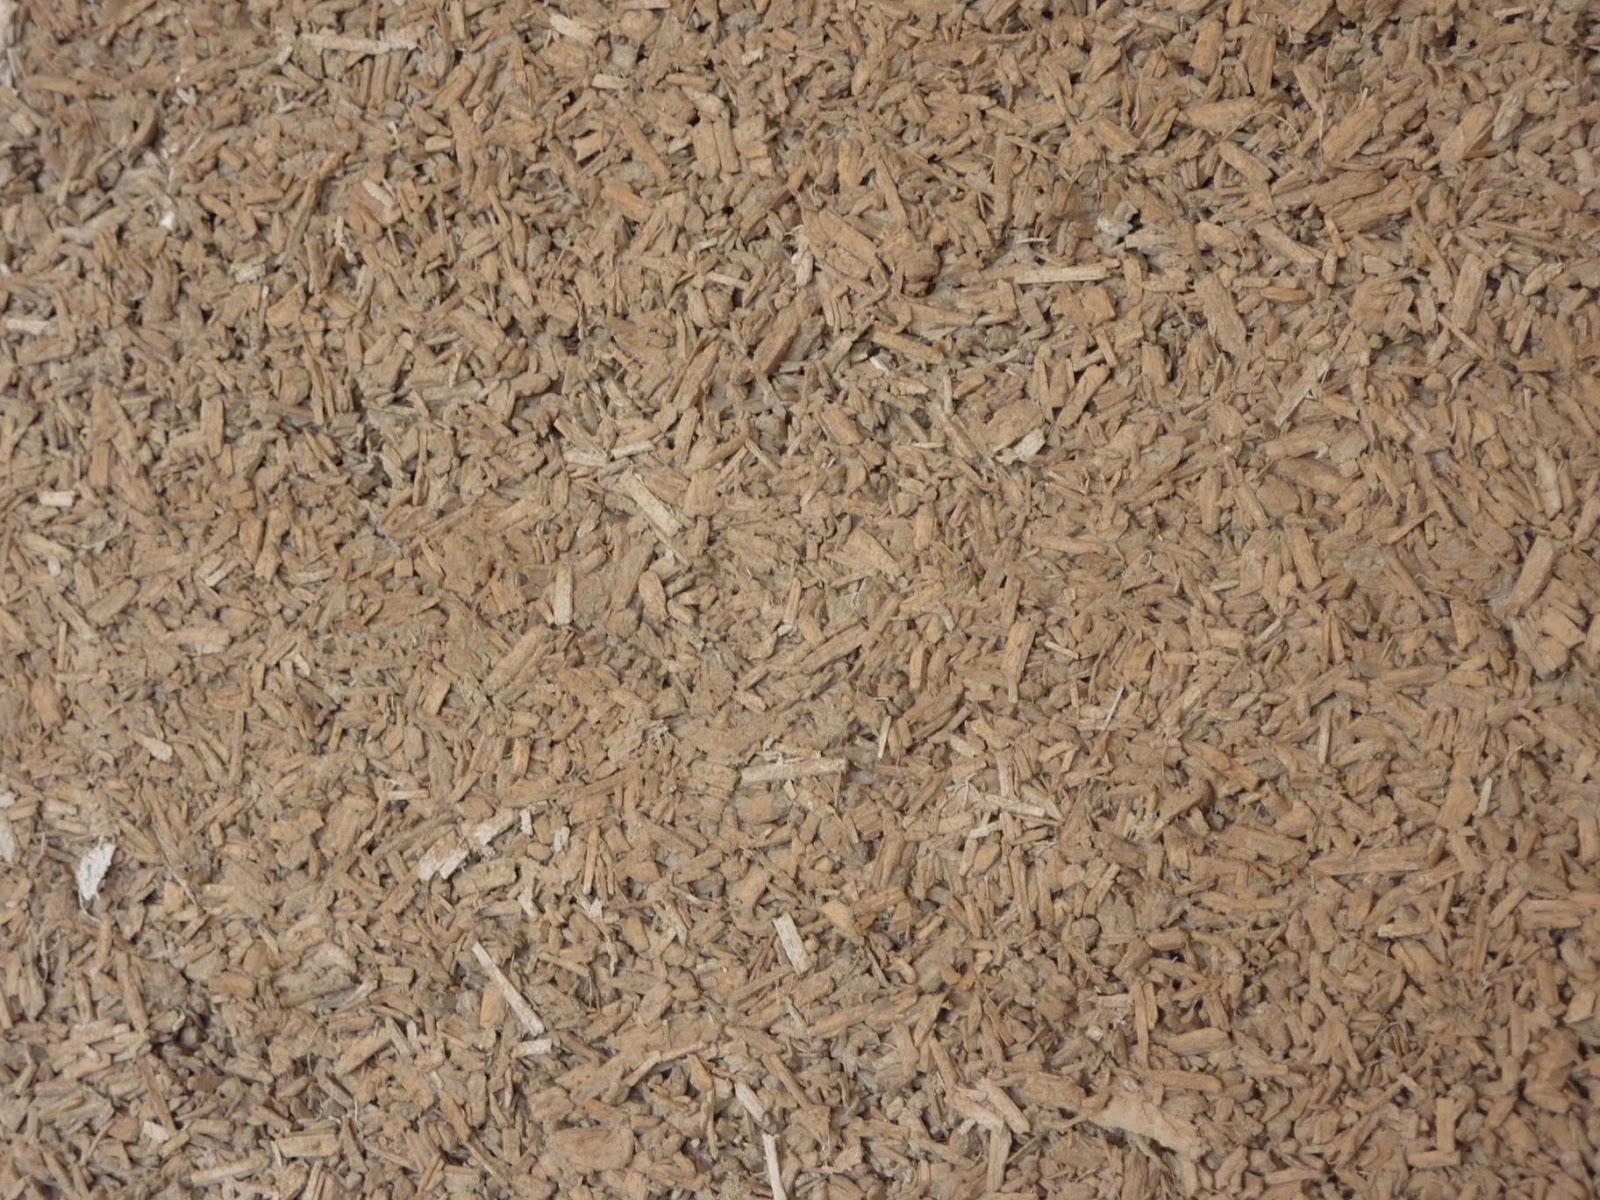
Fine chop of the hemp
Once the walls had been placed they used more magnesium board as a ceiling lining, leaving the bottoms of the timber I-beams exposed in the main living area, as a decorative feature. A light hempcrete mix was then placed between the roof beams, the sarking installed and the Colorbond decking style roofing material was placed on top. 

Rodney showed me the binder and render they used, all of which was imported from Europe – the binder was the UK Tradical binder, it was a very fine almost slippery lime based powder, it did not look like it had any sand in it and did use any added sand like the AHMC binder I am using. For the renders he used one type of render, done in three coats by a professional renderer on the inside and three coats each with a different product on the outside. The internal render was a very fine lime based powder and each coat was quite thin. The external render was much thicker and Roger had wanted a textured finish on the outside, so one of the external coats looked like it had little polythene beads in it, that created this finish. I can not recall the product used but it was imported from Europe. The need for a special external render on Roger’s house may have come from the absence of eaves and the driving rain and wind that would come straight off Bass Straight in bad weather. Thankfully I was there on a beautiful day.
Detail of external textured render and curves around windows
The day was sunny with cloudy patches and a gentle breeze, but the inside of the house was warm but not stuffy. It had a soft comforting feel that is hard to describe. The large rooms were not echoey but at the same time sound was not overly dulled. I could not tell whether this feeling came from the hemp walls themselves or the gentle curves in the corners of the walls and the ceiling, but it was very pleasant nonetheless.  

Main living area
Upstairs bedroom with view
I was also impressed by the use of timber in the house, the beautiful timber stairs showing the natural edge of the log, as well as the custom made Blackwood timber doors and door jambs. The timber work in Roger’s house has inspired me to make my own door jambs – I just have to source some nice timber. Roger’s house also used Aluminium framed windows. I was very happy to see this as I am also using Aluminium framed windows, whereas most other hemp houses I have seen in books and on the Internet use timber framed windows. The finishing detail on Roger’s windows was a little different to the approach I will take as his walls are thicker than mine, but I was pleased to see that the Aluminium framed windows did not look out of place.
Lots of windows facing north and the views
Curve of the house matched the curve of the slope
I asked Rodney lots of questions about construction detail and how different materials could be used in conjunction with hemp walls. Rodney generously and patiently answered all my questions and i think I will have a better house because of it. Roger’s house does not use any skirting boards and I will do likewise. I had been worried about my internal door jambs detail and how to joint the plywood I had intended to use for my internal wall linings with the renders hemp walls. Both matters were solved by switching the internal wall lining to rendered Magnesium board, so I could (try to) replicate the lovely rounded corners in Roger’s house and bring the render up to the edge of my door jams. 

Rodney also introduced me to renderers mesh and recommended that I place it in the render at any stress point, such as above the corners of doors and windows, to prevent the render cracking. I could also use it over the sections where my hemp wall had cracked to prevent any movement in the render. Rodney also provided me with a method to rectify the sections of wall that had pulled away from the stud using a large round plastic anchor disk, normally used from attaching polystyrene, and a long decking screw. I will definitely obtain the necessary materials and try this out. He also shared with me his neat method where extra keying in was required. It involved the attachment of a piece of timber shaped like a wedge with the tip cut off. This could then be attached to a stud or lintel and the hempcrete would key into the narrower end of the wedge, with the wider end holding the mix in. We also discussed parapet wall detailing and flashing – he cut a 25mm slit into the hemp wall, slipped the top of the roof over flashing into the slit, then sealed the slip with some silicon and rendered over it all.  

I am indebted to Roger for opening his house to me and Rodney for his time and sharing his experiences. It is this kind of sharing of knowledge that will support the growth of a hemp construction industry in Australia.

Thursday, 11 October 2012

Mix too wet

Half way through the hemp walls it was a real blow to our confidence and morale to find out that our hemp mixes have been too wet. Correspondence with Klara from the Australian Hemp Masonry Company pointed to my cracking and pulling away cracking problems being caused by my mixes being too wet and therefore having a higher amount of shrinkage and also possibly insufficient wetting down between layers. On reflection I have noticed that I have been making wetter mixes as the days have got much hotter.

So we have reduced the amount of water in our mix to one 9 litre bucket for each mix (5.5kg hemp, 9kg binder and 8.5kg sand) with just a tiny bit more water added if the sand is really dry. With our dryer mix recipe in hand we did one days work hemping and will be more cautious and see how it goes before doing more walls. We used 9 litres of water only for these mixes and I was worried that they looked too dry as the sand did not seem to be held to the hemp and binder but looked like it was sitting on the outside, but as my partner pointed out I got it wrong the first time, so he got his way and we used 9 litres only. But just to check I made our last mix using 10 litres of water and was much happier with how the sand was bound in.

The dryer mixes looked a little different. They stuck more around the top of the mixer, but when emptied out left the inside of the mixer looking cleaner, they poured out of the buckets easier, but were not any different to tamp.

When I took the form work off these dryer sections the next day I could hear some sand fall out when I removed the formwork, and had a little bit of hemp fall out when I removed the spacers. I thought the wall was well tamped but the hemp falling out happened on a few but not all spacers, so whether it was due to insufficient tamping or too dry a mix I could not tell. To try to ensure more even wetting down, particularly when starting a new rise, where the old layer can be quite dry we have used a children's watering can. Due to other commitments we can not work on the walls for a couple of weeks, so we will see how they look when we return to site by which time they will have had a chance to dry out.
The dryer mix
My friend Martin, who helped out with the build a few weeks ago but has no background in hemp building, seemed to be able to pick the cause of my problems and commented in response to my complaint about cracks in my walls -  "They look like the shallow, narrow, non-structural cracks that you get in cement as it drys, if you mix it up a bit too wet. Isn't that what the render is for? To cover up the imperfections and hold the whole show together?" I only hope he is right about the render being able to cover up such imperfections.

Following my worries about my mix now being too dry, I turned to Klara again for advice. She said "The mix should be as dry as it can be and still clump together." But if with 9 litres of water the mix was still too dry I could add up to a quarter of a bucket of water. So after my earlier debate with my partner it appears that the mix I used with 10 litres is still within the acceptable limits. I estimate that in the old mixes I was using about 12 to 14 litres of water (as my one bucket then was about 4-5 cm from the top), so clearly that was too much water.  

We will finish the rest of the house using dryer mixes and then see what we can do about the back section with the cracks, perhaps we will do some test render patches to see if that will cover them, before we contemplate the possibility of having to pull some sections down and redo them.

Kitchen wall up to window height
Uneven layer due to noggins alternately being at differnt heights at top of previous rise
No new wall, but formwork moved up ready for the next weekend of work

Tuesday, 9 October 2012

Hemp Wall Cracks and Problems

We had a long weekend ahead of us and so started with the most time consuming and difficult part, working in the section above the windows and below the roof. The section we did above the windows did not work as well as hoped. On the outside it was OK, but on the inside where the timber we had added to support the hemp was thicker, we had not left a large enough section to be able to fit our fingers in to tamp the hemp down and accordingly there was insufficient hemp coverage in these sections. We will patch them and hope that the render covers it all evenly.

Insufficient hemp coverage
A patched up section
My second issue was that as the walls have dried they have pulled away from the timber frame at the doors.  I believe that this has been exacerbated by the large number of studs next to some of the doors, up to four studs together. The high walls and large openings for the sliding doors required additional support, hence the high number of studs. I am worried that these sections where the hemp has not been able to key into the other side may crack off. I do not know if such concerns are unwarranted as these edges are bound to the rest of the wall which is keys in to each side. Interestingly at the windows where the hemp is bound into the rest of the wall at the top and bottom the same sort of pulling away has not occurred.

The worst of the pulling away sections
My third problem is a number of cracks, a number of horizontal cracks have developed mostly where two rises join together. There has sometimes been a few weeks between when rises were done, hence the older sections were much dryer. Vertical cracks have also developed on each end of the back pavilion on the shorter walls just around the corner from the long 9.6m back wall. There is one crack in almost an identical position on each of the shorter walls, but no vertical cracks in the long 9.6m wall. Traditionally in a brick wall an expansion joint would be put in a long wall to avoid cracking, but here the cracks have appeared in the shorter walls.

Horizontal crack between layers
Another horizontal crack between two layers of different dryness
Vertical crack
To cope with the pulling away at the door frames I improvised a U-shaped metal bracket out of some left over fascia brackets. The metal, being much thinner than timber restraints, was spaced to ensure that I was still able to tamp all around the bracket. Whether this will work will only be seen once the walls dry out.

Metal bracket placed where there are four studs in a row
Metal bracket inside form work, with enough space left to tamp around it
On the positive side the plumbing rough in had been completed - on the first day my plumber got back from holidays (many thanks). The kitchen wall certainly had a lot of pipes and conduit through it  - hot and cold water, gas and electricity.

Kitchen wall with lots of pipes
Holes made in form work for pipe penetrations
Predicted poor weather over the long weekend did not arrive and we did four days of hemp walling, with Tony once again helping us on the last two days. A third person made the hemp walling more than 50% faster, particularly on the low long easy runs where we quickly went through a lot of mixes. With all this effort we have now started all the walls except a few short ones beside the front door and between the glass sliding doors. To be able to do this we had to relocate two and a half of binder that were too close to the wall in the front pavilion to allow access. Almost one pallet was moved to and stacked up in the room we mix in and the other pallet was stacked extra high on top of the remaining two pallets in the front room. Storage of materials under cover of the roof, while allowing access to the walls has been an issue, solved with the hemp by using up half a bag until it was light enough for two people to lift up onto the other bags, therefore allowing us to clear the floor area quicker than if we had just used full bags.

Back wall of the back pavilion completed
Hemping around the instantaneous gas hot water system
First rise in the kitchen wall
First rise in the front pavilion


Tuesday, 18 September 2012

Hemping timber lintels and up to ceiling height

Joined by our good friend Steve, who had travelled down for the weekend from Port Macquarie, we managed a day and a half of hemping over the weekend. Steve had helped us bag the inside of our mudbrick house almost 10 years ago and had helped friends build a straw bale house earlier this year (http://www.pearlandelspeth.blogspot.com.au), so he took to hemp building quickly.

Friday we started a new wall on the western end of the main pavilion. Hemping without the interruption of noggins and windows was a breeze and we clocked up 9 mixes in the afternoon. Forming up and hemping the acute angle between the main and front pavilions was not difficult.

Acute angle between pavilions
 Saturday morning we tackled the difficult spot of hemping up to the ceiling and above the windows.  We were worried about the hemp not having anything to key into above the windows as there was a large timber lintel and the hemp only joined up with the other side for a small section above the top plate. To combat this we improvised some timber v-shapes across the lintel where it was thinner than the frame timbers this would allow the hemp to key around them and the v-shape provided resistance to gravity to stop the whole section of hemp just falling out. On the inside the lintel was flush with the frame timbers so we added a cross piece to our v-shaped timbers, with some added holes in the cross piece for more keying in. All of the timbers were at least a finger width inside the form work to allow coverage by the hemp and to allow them to be easily packed around. The timber pieces were easy to hemp around and when the form work was removed there was no apparent movement of the hemp. We did however leave in place the form work on the underside of the top of the window and will do so until just before the windows are installed.

V-Timbers on the outside of the lintel

V-Timbers on the inside of the lintel
Form work away from v-timbers
Working high up was not as difficult as we expected, the secret to this was keeping the rises small - about the depth of your hand. As the join between rises is an area then can be a bit weak we raised the outside form work to its maximum height, but raised the inside form work up in two stages. As soon as we had hemped to the top of the inside form work and hilled the hemp up against the higher outside formwork we removed it and raised it up. It was not a problem moving the formwork up so quickly as the boards were large enough to completely support the work that had just been done and this quick movement of the formwork prevented there being a joint between the rises. Work was slow and we only got 5 mixes done in a whole morning. 

Hemp done to ceiling
Corner section to ceiling
Outside wall to eave line

Hemp above window to eave line
To take a break from working high up we spent the afternoon doing the second rise on the western wall of the main pavilion and the hall way. This was so much easier and we got a further 13 mixes done - more than making up for the slow morning.

Western wall of main pavilion
Around the corner into the front pavilion
Progress on the hallway
Just to prove that it is not too early to swim at the beach in mid September we all jumped in for a dip before the trip home. The south coast water felt icy, at least until I lost the feeling in my feet.
   

Monday, 10 September 2012

Hemp Building Video and meeting other hemp builders

With help on site over the last two weekends we have been able to film a little bit of the hemp building process.

As we have got closer to the roof our rises have had to get smaller, as your arm reach gets smaller when you are building at almost head height. The invention of the micro tamper, with a handle as long as your fist helped save the day. It joins the wide and narrow full size tampers, the half sized mini tamper, the L-shaped tamper, and the no handled tamper as well as various sizes of timber (for narrow spots) as pasrt of our array of tamping implements. Further difficulties have also become apparant such as how to get the hemp mix to stay against the lintels where there is very little space for it to key into the other side. We will try our solution to this issue next weekend.

Tampers - Wide, Narrow, Mini, Micro and L-Shaped
Difficult section at lintel above window
It was with great joy on Saturday that we started hemping the main pavilion of the house (the house being in three pavilion like sections) and shared this with Nicole, another hemp builder from the south coast, who will commence building her hemp and stone walled studio soon. Nicole shared with us the progress of her build, including the ease with which she got Council Approval, compared to the difficulties I had, despite us building in neighbouring Council areas. Hopefully we will be able to continue to share hemp building knowledge and resources. After working on the higher sections of the walls working back at ground height was refreshingly easy.

Tamping the first rise in the main pavilion
First rise in the hall and main pavilion
View of the future courtyard garden
 With the formwork stripped off we could see how much we have done. We have done 132 mixes to date over 4 weekends, which I estimate means we are 1/4 of the way through the walls. Another milestone is that we have used one of our five pallets of binder. To get the hemp out of the way of the walls so that we can build them, we have been using about half a bale of hemp until they are light enought to lift ontop of each other. With a bit of manouvering we now have access to all the walls so that the plumber can finish roughing in all the pipes. The plumber was not able to do this earlier with all the bales of hemp in the way. I had been planning to do the kitchen wall next until I realised the gas and water pipes had not been properly finished off. Instead we hemped the back wall of the main pavilion, until I realised I could not go more than one course high as the pipes had not been put in for the instantaneous hot water system. We can not go much higher on the back pavilion until I get the awnings put up as they attach to the frame. Hopefully I will be picking the steel connector plates, for the awning, up from the metal fabricator this week, so this work can get under way.

Walls finished to lintel height
Back wall of the back pavilion
Inside one of the bedrooms
Back pavilion and hall with expansion joint between

We also saw four seals this weekend


Monday, 3 September 2012

Help arrives at hemp building

On the last day of winter we began to share our hemp building skills. Tony, who we had met at Klara Marosszeky's Hemp Building Workshop in October 2011, joined us for the weekend. Braving an afternoon cold front that significantly dropped the temperature the three of us managed to do 18 mixes of hemp walling, working in some tricky areas under the noggins.

Saturday brought improved weather and further reinforcements, friends Martin and Nerida and Tony's son, Joel and Joel's partner, Alice. Our helpers picked up the mixing and tamping skills quickly and did a great job. As the walls got higher we used firstly milk crates and a plank as our scaffold and then a plank on a some steel stands. To fill and tamp the walls as they got higher we had to be able to both see down into the form work and be able to reach a hand or tamper down to even out and tamp the layers of hemp lime mix.

Hemping higher up the walls
Working in a section with several closely spaced studs

Once again we were working under window sills and noggins, but changes to the placement of form work made the work easier. The form work was at or just below the sill or noggin on the outside and about 12cm below the sill or noggin on the inside. This created enough room for an arm to reach under the noggin, but also allowed the hemp to be built up to and under the noggin on the outer side with the inside to be filled when the form work is moved up. Work was slow where there were lots of closely spaced studs, but difficult to get at sections were easier with one person spreading and tamping the hemp lime mix from the outside and another working from the inside.

Tamping under a window sill

Window sill - sloped down on the outside to shed water
There was great camaraderie and we set a new daily record of 26 mixes, bringing our overall total to date to 102 mixes. To achieve this we had five people working all day and extra two people for half a day, however when we had seven people two were moving form work up while the rest mixed and tamped the hemp. We have been using half a bale of hemp until it became light enough to lift on top of the other bales of hemp, this is so we could clear more floor space and gain access to more of the external walls so that we can form them up.

Layers of hemp - differing heights of layers due to location of noggins and windows
Layers of hemp finished over different weekends

Sunday was a glorious sunny spring day and this made the work of moving the form work up more pleasant, as did working with a tall helper. As the form work was moved higher up it became necessary to have two people to move it up. In one section the form work has been moved up to where it will join the eaves lining, we will probably have to do this section in small rises, with the form work lower on the inside.
Form work getting higher

Form work moved up, one section on outside to eves height