I had arranged with local Culburra builder Rob Cheadle to start putting the frame up on Tuesday, but on Monday with bad weather predicted for Tuesday and Wednesday, I cancelled and rescheduled for Thursday. This turned out to be a prudent move as a big storm hit the south coast and Sydney on Tuesday afternoon and the showers kept up all day Wednesday. When I arrived on site Wednesday night there were still intermittent heavy showers of rain, so I was pleased when I woke the next morning to a clear sky.
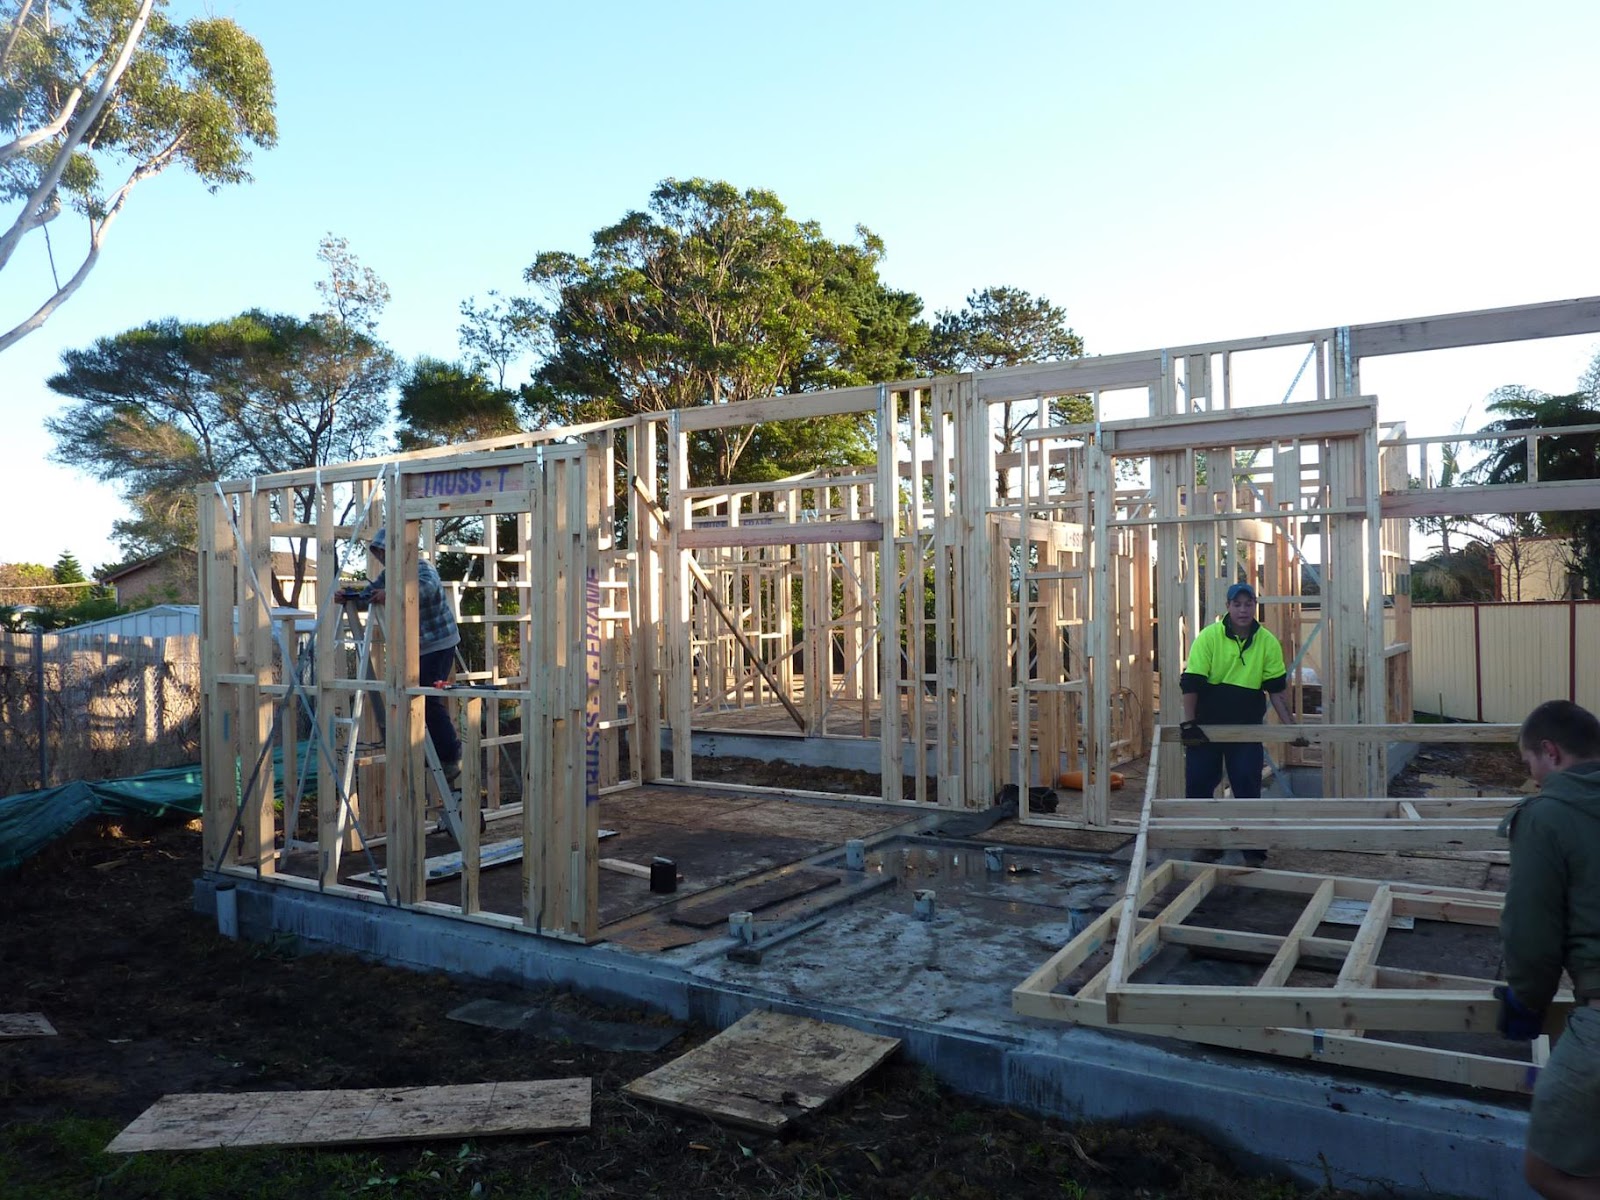
Rob, Joel and Chris (joined by Dean on Friday) arrived on site early Thursday morning and we got to work unpacking the frames from the large stack they had been craned into off the delivery truck. Sensibly we were to start with the section furthest away, so there were no walls in the way as we carried the frames. Unfortunately this section of the frame was stacked second from the bottom, out of six groups of frames. The trick was to try to stack the other frames we had to lift off close to were they would be needed to avoid double handling, or at least place them out of the way.
To begin with the stack of frames was well over head high and the frames had to be manually manoeuvred down. Truss-T-Frames had provided a layout showing where each numbered frame would go, as well as numbers on the corners of the frames that matched up with the adjoining frames. It was an adult sized construction set. With the layout in hand I appointed myself frame locater and director. This was easy for me as I knew the plans by heart and could often tell where a panel of the frame had to go just by looking at it.
With the the first three walls of the front section of the house unpacked the builders got to work standing the frames up and nailing them together at the corners with the nail gun. Overcautiously I had a layer of embossed polyethylene damp proof course put under the frame and across what will be the internal section of the hemp wall. Later a second damp proof course will be laid down bottom of the frame and across the step down in the concrete. The builders said that the damp proof course under the frame was not necessary as the slab was on a plastic membrane and that should prevent any rising damp. But as hemp masonry walling is new in Australia I took the conservative approach and put it in, eve though that meant a bit more work for the builders.
 |
| The first three walls go up |
 |
| The front pavilion takes shape |
 |
| Walking up to what will be the front door |
|
It was delightful to see how quickly the house took shape. With the frame for the front pavilion done we moved on to the hardest part, the two large sections surrounding the 2400 high sliding doors and highlight windows. These were dificullt because they were the tallest frames and they were both heavy of themselves and top heavy due to the large lintels above the sliding doors and highlight windows. Rather than lift the frames, as they were already upright with the heavy side down from when we unpacked the frames, we slid them onto the slab and then lay them down with the bottoms almost in place, so they only had to be lifted up to be in position. Easier said than done as when the frames were lifted their top heavy nature caused the bottoms to skid out. Some props were then put in place to prevent the frames from skidding off the slab and with a bit of effort the frames were errected. While the boys did all the physical hard work of the lift I had the job of making sure the frame did not slide off the slab and later the job of holding the support brace to keep the frame upright as the boys moved it into place. Lunch was well deserved after manouvering those large frames into place.
 |
| The big heavy frames upright and in position. |
|
The joy of getting those big frames up was tempered by one of the openings for the glass sliding doors being 80mm in the wrong place. This would not have been a problem except that rebates had been made in the concrete where each of the sliding doors will go so that the door will be set down so there will be no lip to trip over. The builders suggested cutting out the now jutting out piece of concrete with a grinder and filling in the now redundant part. To the credit of Truss-T-Frames this was the only problem with the frame and the builders commented on (otherwise) how accurate the frames were and how easily they matched up.
The problem is not unfixable but disappointing as the door is now closer to the thin section between the glass doors and had the door been in the right place the studs in the section could have been done differently. As it is there is a tall thin piece of wall filled solid with studs which will create problems for me when I put the hemp walling into place as there will be nothing to key one side of the wall into the other. I will have to find some solution that will not compromise the strength of the studs. The height of these walls will also present challenges in both getting the form work for the walls up there and the hemp mix.
By afternoon the main pavilion and hall were also up and anchored to the slab. For tie down we used 75mm M10 blue tip concrete screw bolts. After the bottom of the frame was straightened by measuring in the required distance from the edge of the slab on the corners and string lines were used to ensure the centre of the frames were straight, a pilot hole was drilled with a large hammer drill and the screw bolts easily went in using an impact driver. It made it easier that the slab was accurate, the builders made several positive comments on how well the concreting was done.
 |
| Back of the main pavilion |
 |
| Hallway in place |
Friday morning was finger numbingly cold, it was unexpected in a coastal location, and made worse as direct sunlight did not hit the back of the hose until about 9am due to large trees in a neighbours property. But with four workers in the build team the remainder of the frame went up at a rapid pace and was all done by morning tea. There followed more straightening and bolting down and then making each frame straight to the vertical, attaching gang nail plates to the top corners of adjoining frames and attaching and adjusting the tensioners on the tension strap bracing. As requested there was no ply bracing and the tension bracing seemed to work well and was easy to adjust. I appreciated the care taken by the builders to ensure that the frame was straight.
 |
| Work continues despite the cold |
 |
| Back pavilion all done |
It was exciting to see how quickly the pre fab frames went up. Once up the frame looked just like the 3D computer model I had done, but obviously much larger. The room sizes were comfortable and the window locations worked to block or allow certain views. This was a huge relief as designing a house is a big responsibility, since if I got it wrong it was my responsibility and any mistakes could be expensive.
By late morning the site was bathed in sunlight. It was a delight to see the sun coming in the window openings, and as we are only about two weeks from the winter solstice, seeing how far the sunlight penetrated into the rooms. So far it seems like my copious mathematical calculations have paid off and the solar passive design will work, but this can not be truly confirmed until the roof goes on and when in about another six months the sun moves to its highest point in the sky. Next week the rafters go on.
 |
| Noon at almost midwinter |